01Getting started
New to the server? Connect, grab a Heart, and carve out your first claim before nightfall.
- Join the network. Add
play.myshowbro.netin Minecraft Java 1.21+ and connect. You land in the lobby first — not the survival world yet. - Enter Heart Base. From the lobby, click the Heartbase SMP NPC — the heart-headed one to the right of center — or run
/server heartbase. That sends you to the actual Heart Base SMP server. - Find your spot. The world is bounded by the Pentagon border — everyone fights over the same finite ground, so pick somewhere defensible.
- Drop your Heart. Place your Heart Anchor to claim the land around it. This is the beating core of your base — protect it.
- Feed the core. The Heart Anchor survives on Blood Cash — without it, the whole claim decays no matter what else you have stocked.
- Power your extensions. Kill mobs for regular Blood and feed it into Heart Extensions to raise block HP inside their radius.
- Earn Blood Cash. Build something great and get it rated, trade with ruin villagers, loot bunkers, or sell through a shop.
Lobby first, then Heart Base. play.myshowbro.net connects you to the network lobby. Click the Heartbase SMP NPC (heart head, to the right of center) or run /server heartbase to reach the survival server.
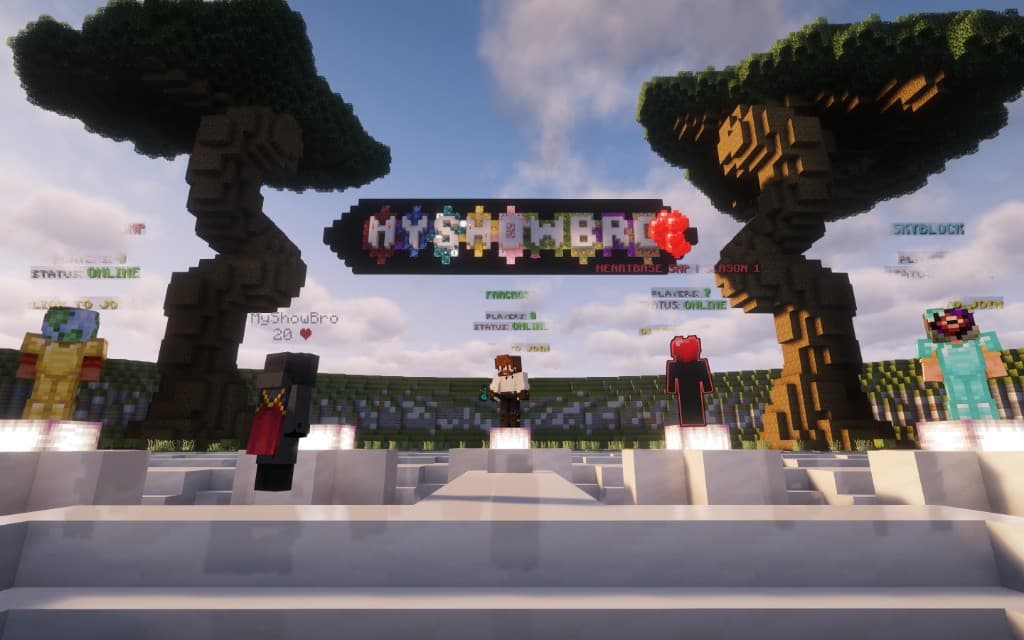
/server heartbase.Hardcore & raidable. The overworld has no permanent safe haven for your base. If you log off in the open, you leave a head behind that anyone can hunt — see Death & logout.
02The core loop
Claim, defend, raid, repeat — Blood Cash keeps the core alive, Blood powers the borders.
Anchor & fortify
Drop a Heart, feed the core Blood Cash, and push extensions with mob Blood to toughen your walls.
Blood economy
Earn Blood Cash from rated builds, ruin villagers, bunkers, and shop sales.
Hunt & take
Track rich bases and careless players, break in, and haul it home.
Each system feeds the next. Blood Cash keeps the Heart Anchor alive; mob Blood keeps your extensions strong; a living claim protects your shops and stored Blood Cash; that wealth funds upkeep and bigger borders; bigger borders make you a target. The loop never stops.
03Heart anchor & claims
A Heart is a placeable block that claims the land around it and powers every protection you own.
Claiming land
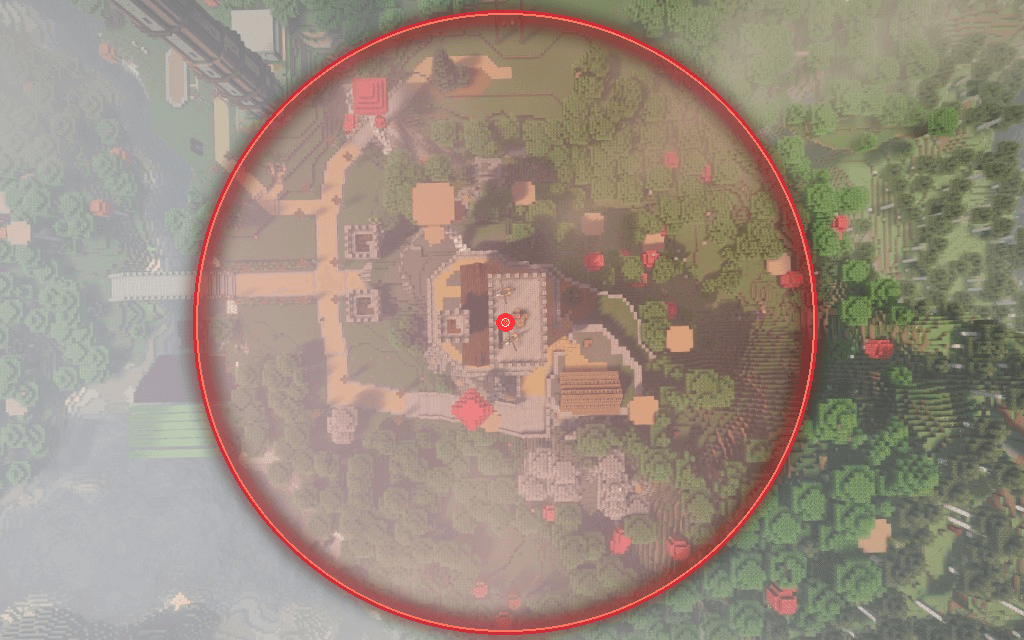
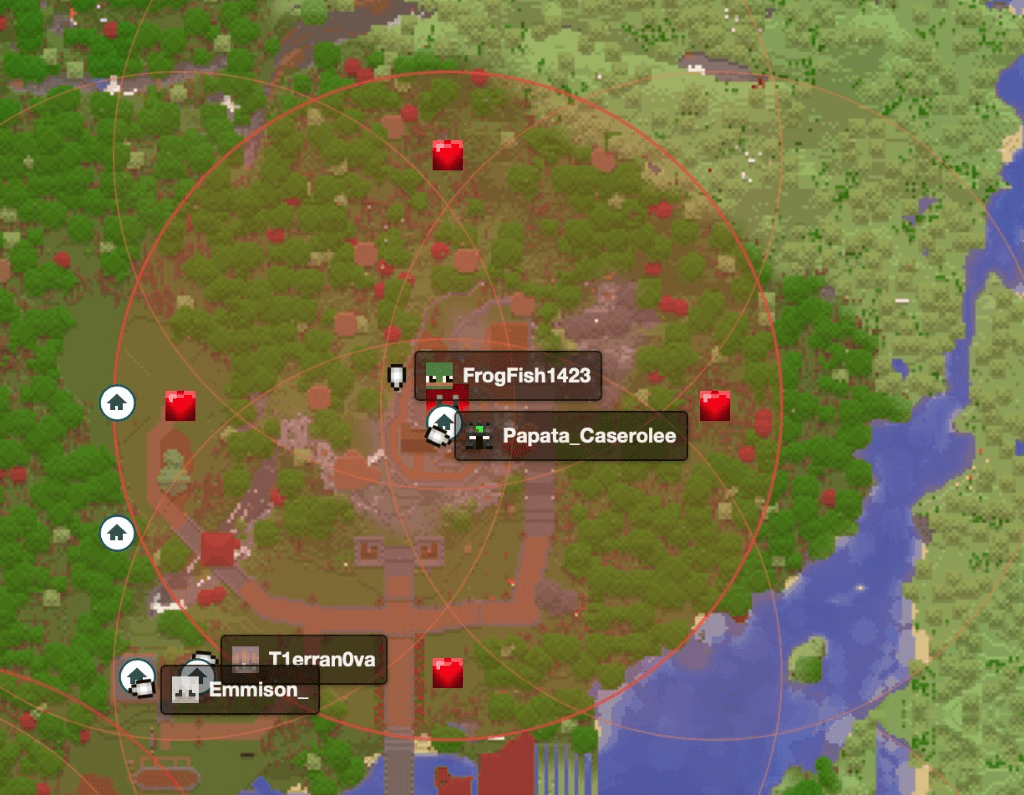
Place a Heart Anchor to create a claim centered on it. The claim is a sphere of protected ground — inside it, your blocks gain HP and resist raiders. Add Heart Extensions to grow the radius out toward 100-block spheres.
Why the Heart matters
- It is the source of protection for every block inside the claim.
- The Heart Anchor core must be fed Blood Cash continuously or the whole claim begins to decay — even if your extensions are full of regular Blood.
- Heart Extensions are powered separately by mob Blood, which raises block HP inside each extension's radius.
- Shops, ATMs and safes only function while they sit inside a living claim.
Heart Core GUI
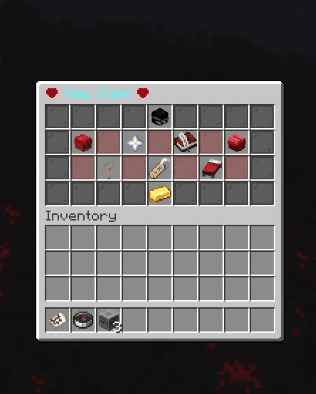
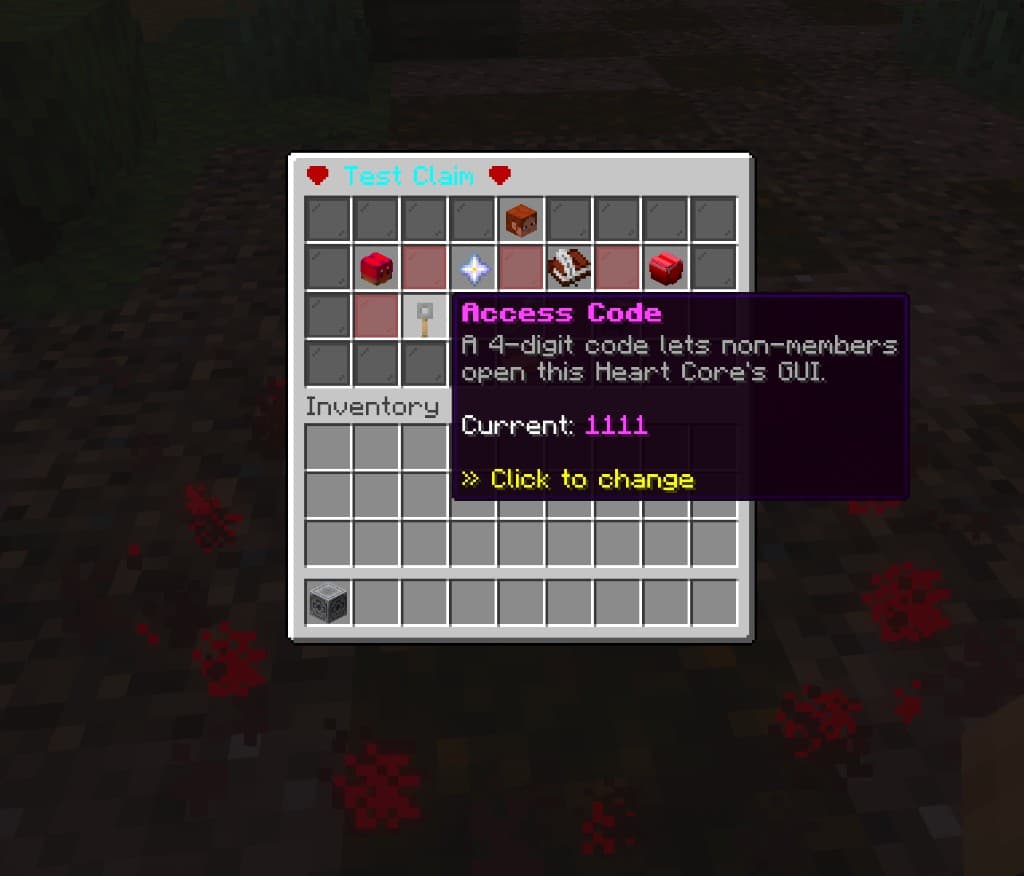
Right-click your Heart Core to open the claim management menu. The owner head at the top shows tier, radius, extension count, members, access code, and upkeep status.
 Heart Core
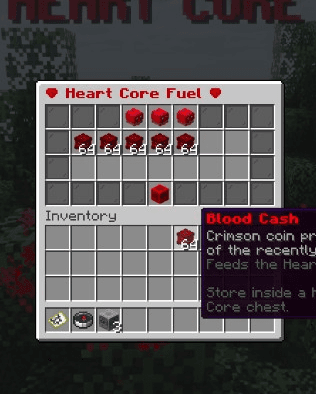
Heart Core fuel
Deposit Blood Cash or Blood Cash bags to keep the core alive.
 Heart Extension
Extension fuel
Deposit Jars of Blood to power Heart Extensions.
 Tripwire hook
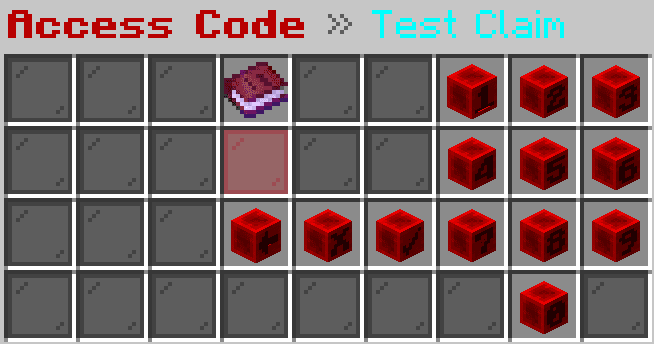
Access code
Set or view the claim's entry code.
 Nether star
Upgrade
No separate menu — hover for the BC cost, then click with enough Blood Cash in your inventory. Raises block HP cap and increases daily upkeep.
 Name tag
Rename & tag
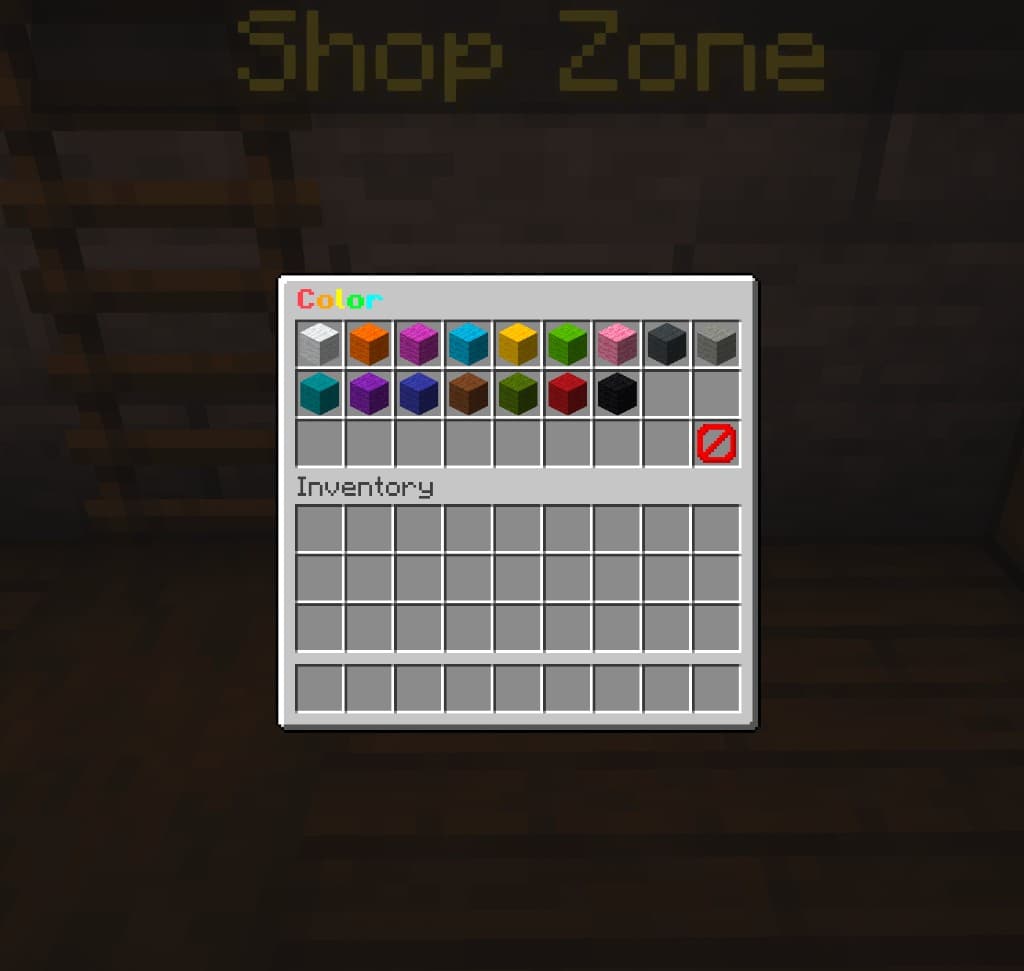
Change your claim name and 4-letter tab tag. Pick wool to set the color.
 Book
BookMembers
Manage who has access to the claim.
 Red bed
Disband
Permanently delete the claim.
 Gold block
Collect build tax
No separate menu — click the gold block to collect tax owed from employed workers on your claim (based on their nest rank and your tax rate).
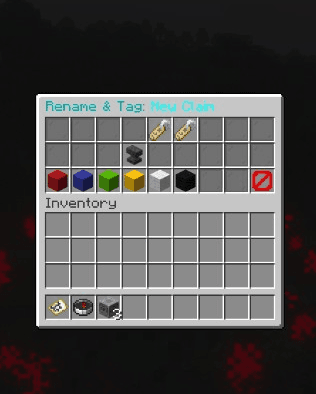
Rename & tag
Inside Rename & tag, click one of the two name tags — one updates the claim name, the other updates the 4-letter tag shown in tab and over your name. Click the anvil to confirm, then pick a wool color.
Members
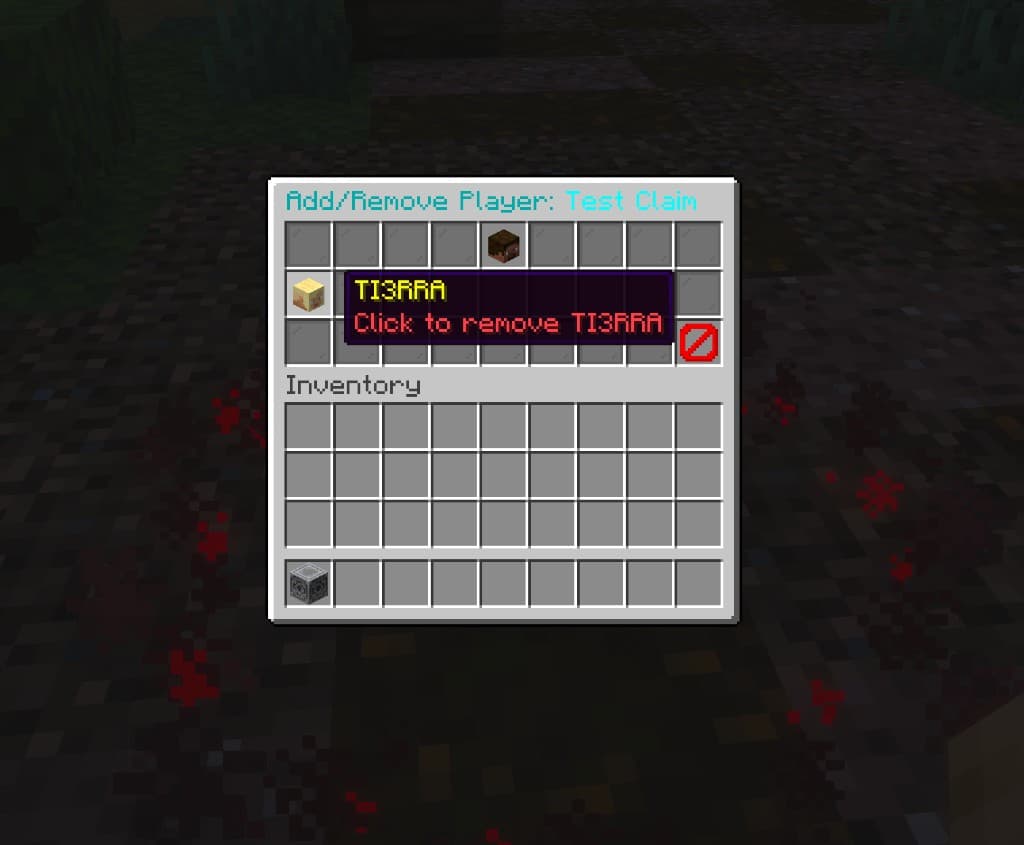
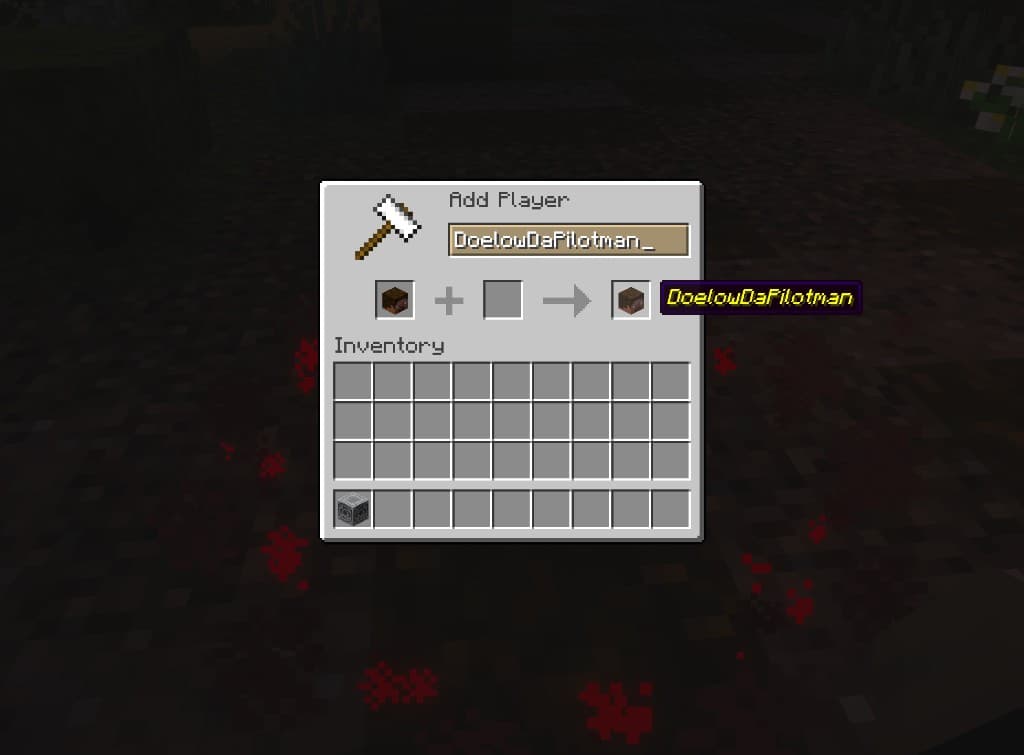
Click the book in the Heart Core GUI to open Add/Remove Player. The Steve headat the top adds a member — it opens an anvil where you type the player name and click the head on the right to confirm. Click a listed member's head to remove them.
Access code
A 4-digit codelets non-members open this Heart Core's GUI. Hover the tripwire hook in the main menu to see the current code — click it to change. On the keypad, ✓ confirms, ✗clears input, and the arrow returns to the Heart Core menu. Hover the enchanted book to see the digits you've entered.
Lose the claim, lose the services. If a claim is destroyed, any shops inside vanish from /shopand the Blood Cash in their ATMs becomes unusable until the land is claimed again. Money is never deleted — it just can't be spent while the land is unclaimed, so hidden wilderness ATMs are worthless.
04Block HP & decay
Every block you own has hit points. Two different fuels keep them up — and both matter.
Heart Anchor core — Blood Cash
The Heart Anchor at the center of your claim runs on Blood Cash. Feed it consistently and the claim stays alive. Let it run dry and the entire claim decays — block HP falls, protection weakens, and raiders move in.
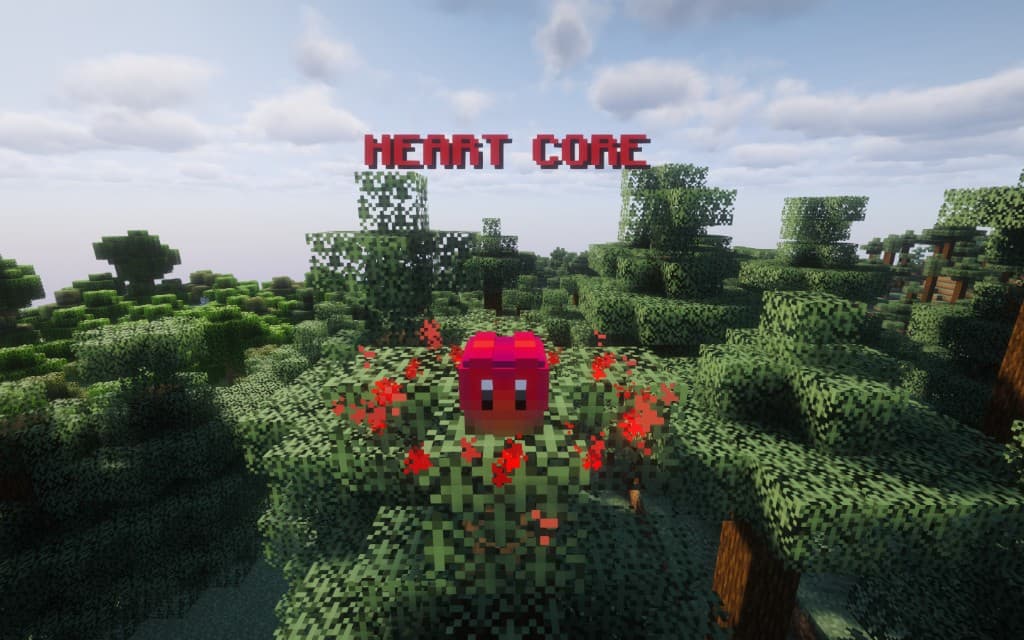
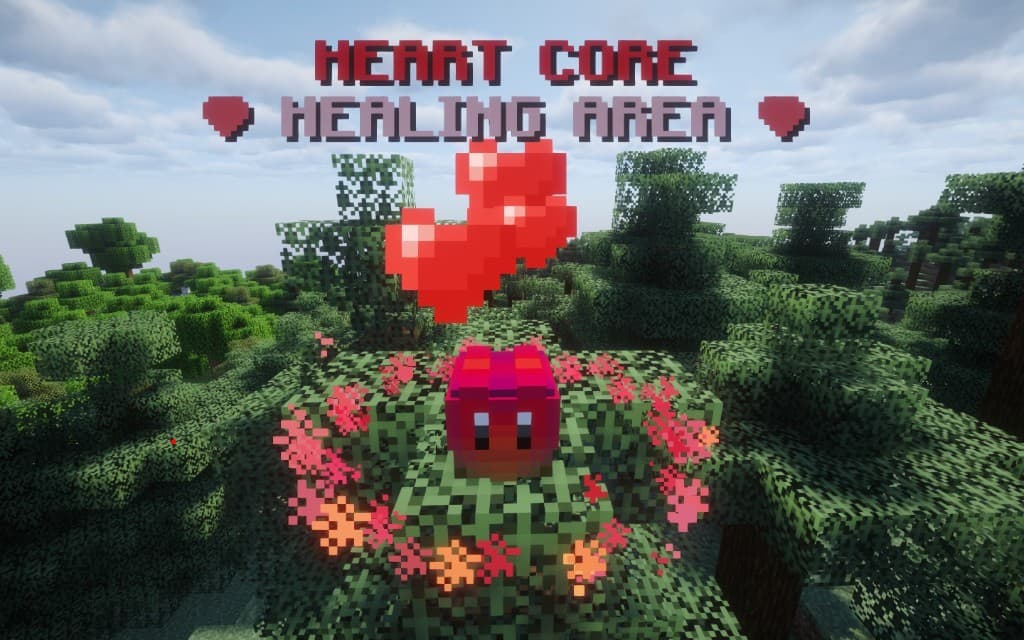
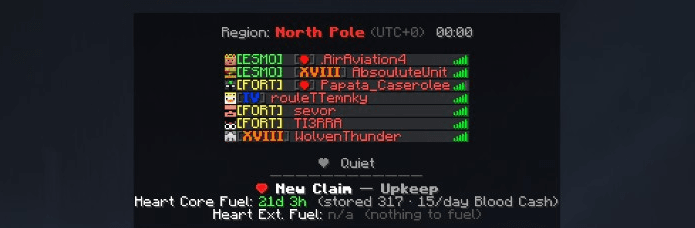
Before fueling, the core sits idle. Deposit Blood Cash (or Blood Cash bags) into the Heart Core fuel chest — the heart-with-eyes icon on the left of the GUI — and the core enters its healing area, pumping HP back into blocks inside the claim.
Blood in extensions won't save a starving core. If the Heart Anchor has no Blood Cash, it doesn't matter how much regular Blood sits in your Heart Extensions — the claim still rots.
Checking upkeep
Press Tab while inside your claim to see detailed upkeep — how much Blood Cash is stored, your daily burn rate, and time remaining before the core runs dry.
Heart Extensions — mob Blood
Regular Blood from killing mobs is fed into Heart Extensions via the extension fuel chest (heart-without-eyes icon on the right of the GUI). That blood drives block HP upwardinside each extension's radius — the more you feed, the tougher your walls become against raiders.
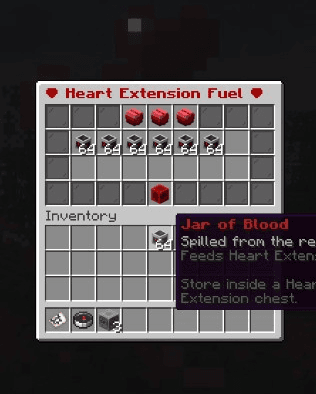
Stop feeding extensions and their zones weaken. Stop feeding the core and everything weakens regardless.
Block HP in practice
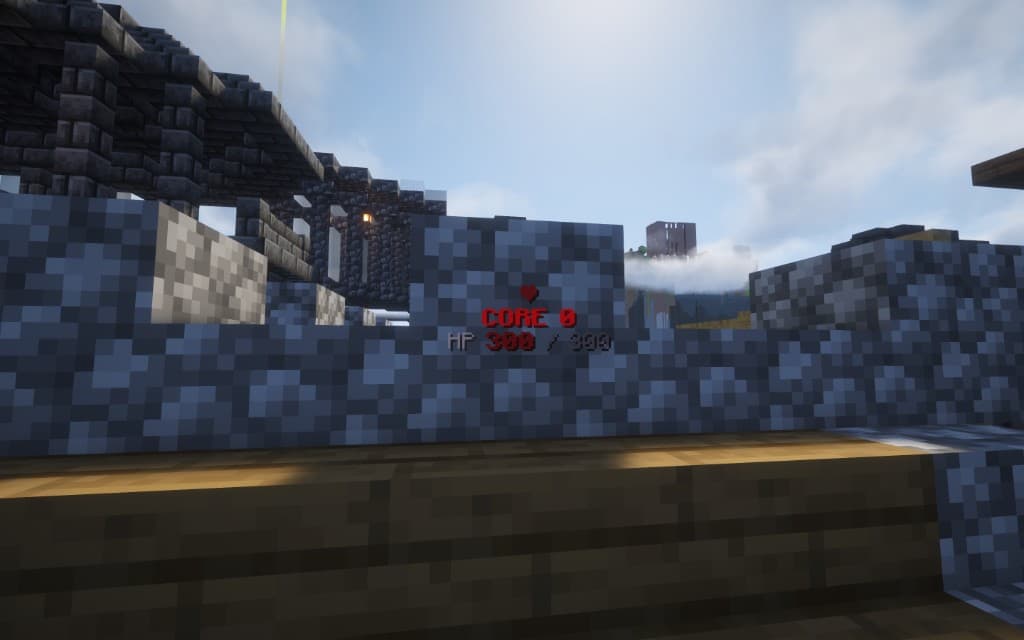
Once the core is healing, blocks inside the claim regain HP. Right-click any block in your claim to inspect it — a level-0 core heals blocks up to 300 / 300 HP. Higher core tiers raise that cap when you click the Nether star in the Heart Core GUI (cost shown on hover).
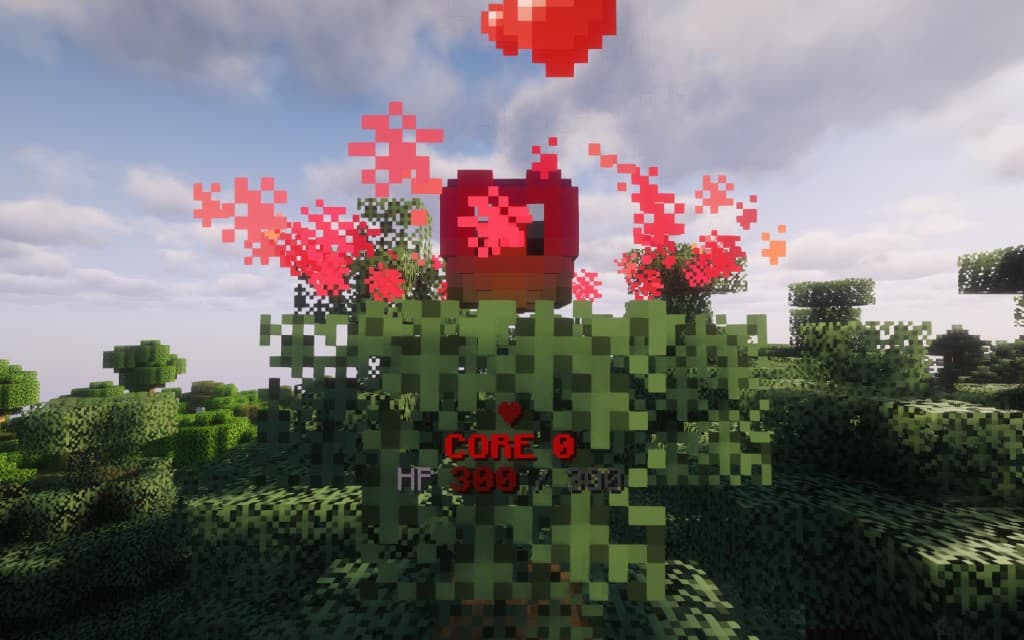
If the core runs out of Blood Cash, block HP drains away slowly — it takes a long time to fall from max all the way to zero. Same base below: fully fed on the left, long-term starvation on the right.
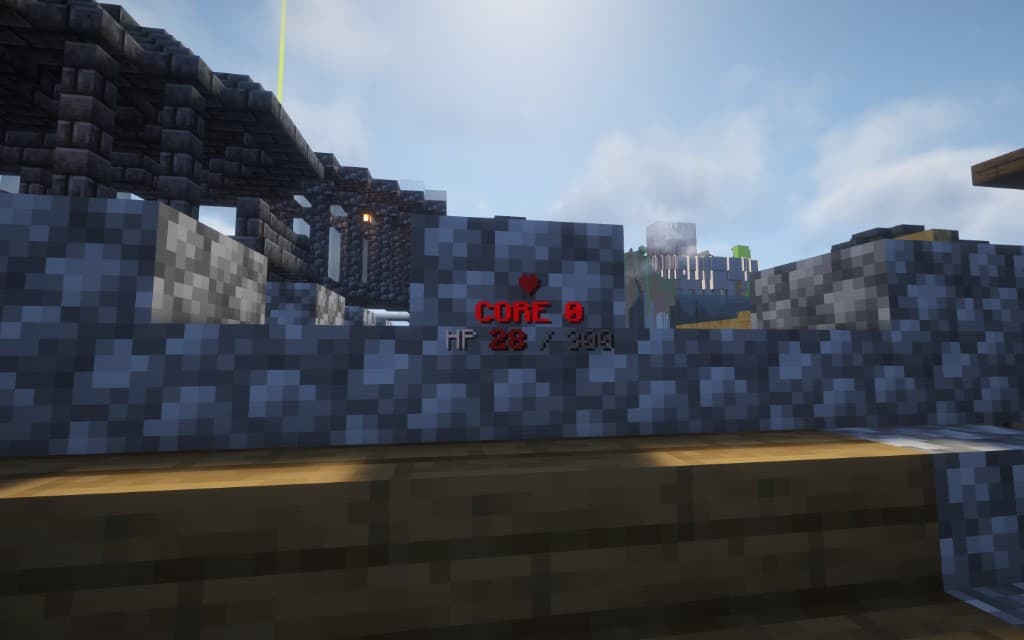
Core fed & extensions stocked
Blood Cash keeps the claim alive; mob Blood keeps block HP high inside extension zones. Raids are slow and costly.
Core starved
Claim decays even with full extensions. HP falls gradually over time — raiders still need to work at it, but walls get easier to break as it drops.
05The Blood economy
Two resources, two jobs: Blood powers extensions, Blood Cash keeps the core alive and fuels the economy.
 Blood
BloodExtension fuel
Earned by killing mobs. Fed into Heart Extensions to raise block HP inside their radius. Craft 9 Blood into a Blood block to fuel helicopters. Does not keep the Heart Anchor core alive on its own.
 Blood Cash
Core & currency
The server currency. Fed into the Heart Anchor to stop decay. Also spent at shops, on upkeep, and with custom villagers.
Where Blood Cash comes from
- Rated builds — a great rating pays out Blood Cash (see Build rating).
- Shop sales — when players buy from your chests, the money lands in your safe.
- Ruin villagers — find custom villagers in overworld ruins and sell to them for Blood Cash.
- Custom bunkers — clear vaults inside tiered bunkers; mobs drop keycards and the last vault holds the jackpot (see Custom bunkers).
- Raiding— take it directly from other players' safes and bodies.
Balance HUD
Your personal Blood Cash balance lives in the top-right corner — player name plus a red $ and green amount. Toggle it with /balance off and /balance on (aliases /bal, /hud).
Crafting recipes
Some items are crafted from mob drops or found in bunkers:
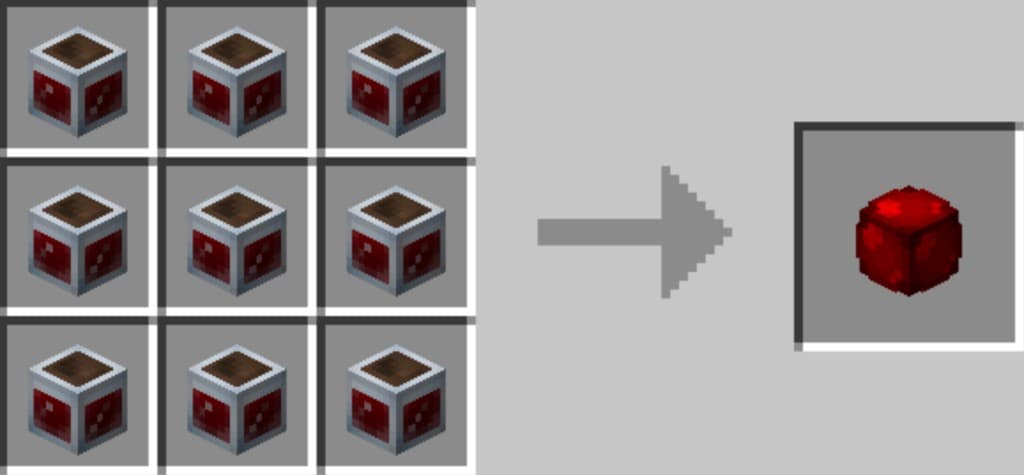
 Blood block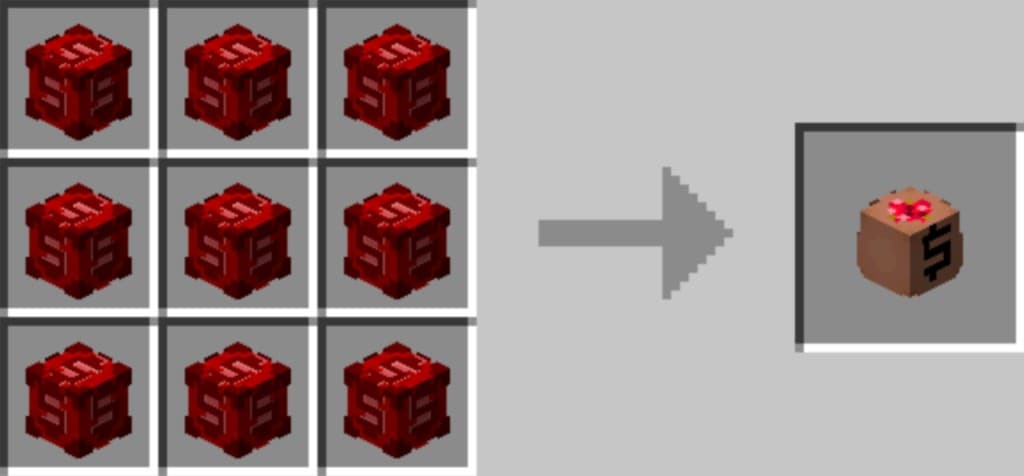
 Blood Cash bag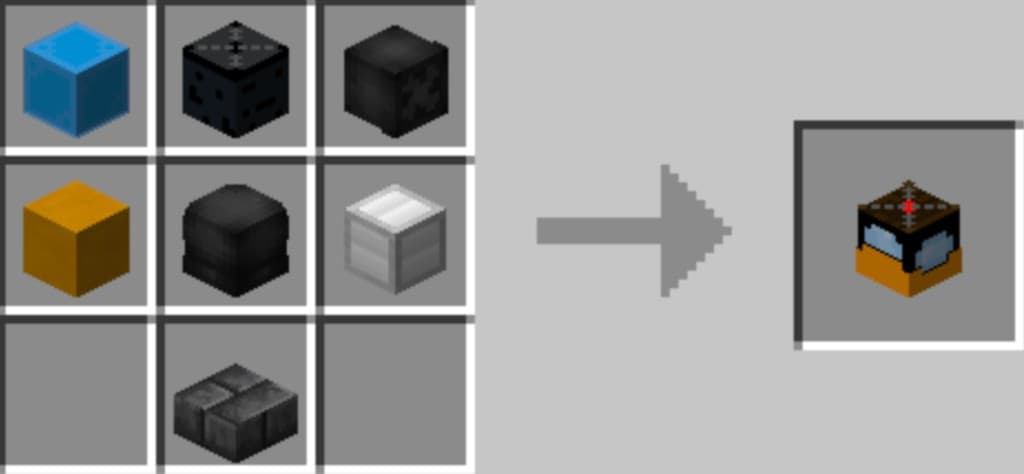
Blood Cash and Blood Cash bags can be deposited directly into the Heart Core fuel chest — bags are just a compact way to store larger amounts of Blood Cash.
06Build rating
An algorithm scores your build automatically — no human judges. Place a nest, mark out a zone, and the math does the rest.
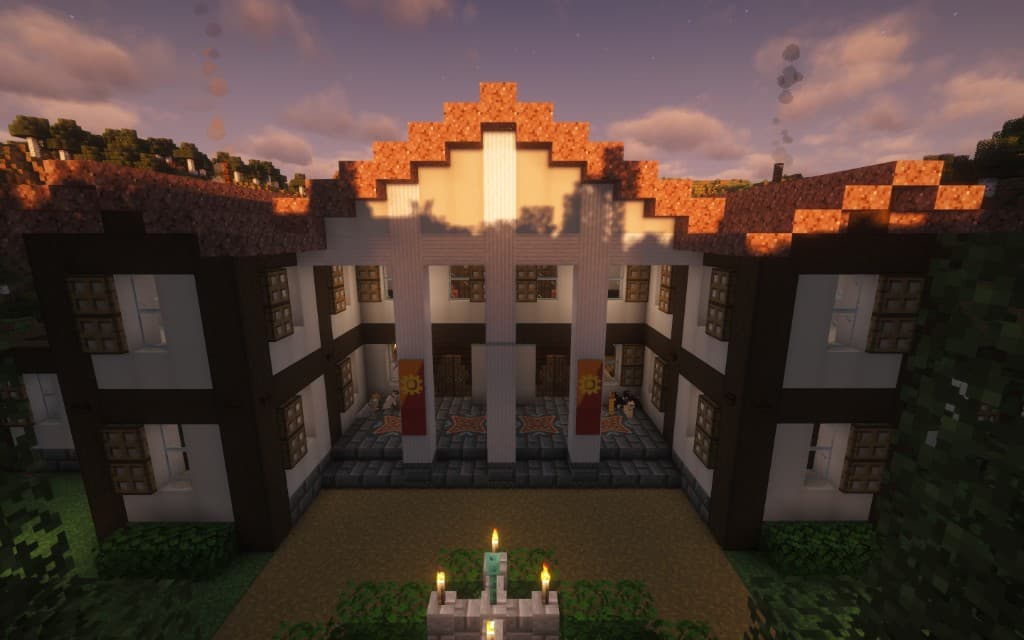
Building well is a real income stream. You set up a nest and define its employment zone around your build. When the zone is scanned, the algorithm analyses every placed block inside it and produces a rank. Higher ranks pay out more, and the best builds climb the Top Builds leaderboard.
The nest zone
Place a nest block inside your claim and open it to manage your build zone. Right-click the nest and the zone outline appears in-world — bright particles mark every edge of the box. Use the Eye of Ender button to flash the borders again for 90 seconds while you resize.
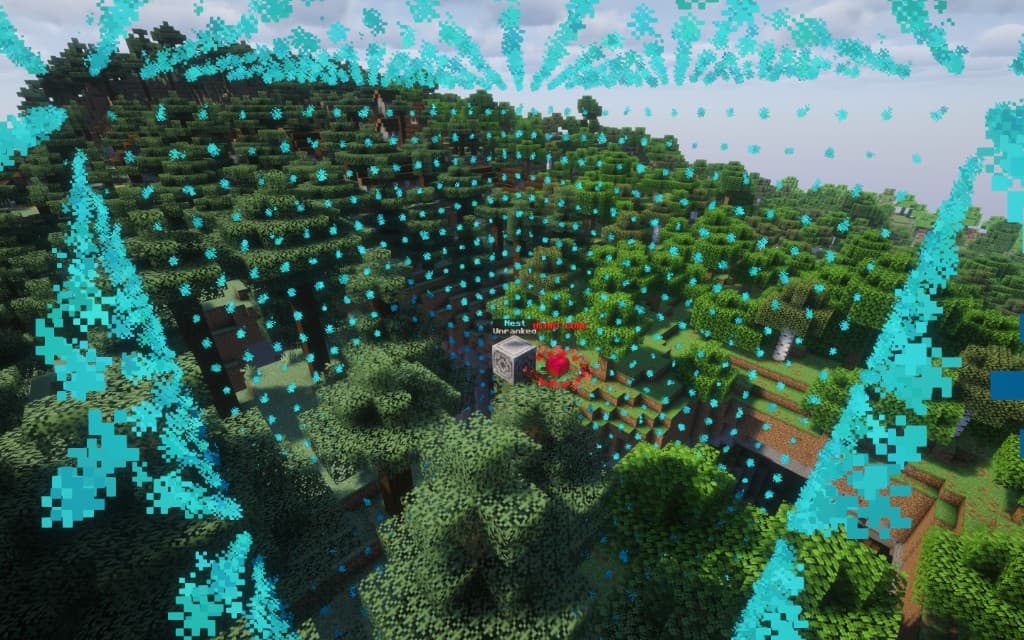
Nest GUI
Right-click your nest block to open the Employment: Nest menu:
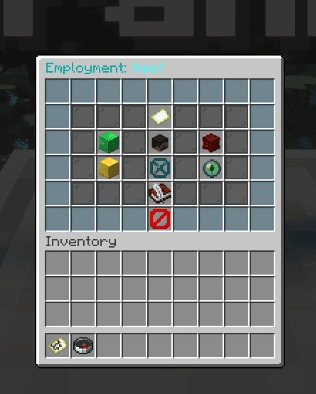
 Emerald block
Calculate rank
Scans every block inside the zone and assigns a rank. Any affiliated player can trigger this. Results appear in chat and on the floating label above the nest.
 Player head
Employees
Hire workers, let claim members self-employ, or remove employees from the nest.
Collect income
Collect employment income owed to the nest from rated workers.
Tax rate
No menu — right-click raises tax by 5%, left-click lowers by 5% (max 70%). Claim owners/managers only.
 Structure void
Resize zone
Adjust each face of the employment box. Managers only.
 Eye of ender
Show zone
Particle outline in-world for 90 seconds.
 Book & quill
Rename
Rename the nest. Managers only.
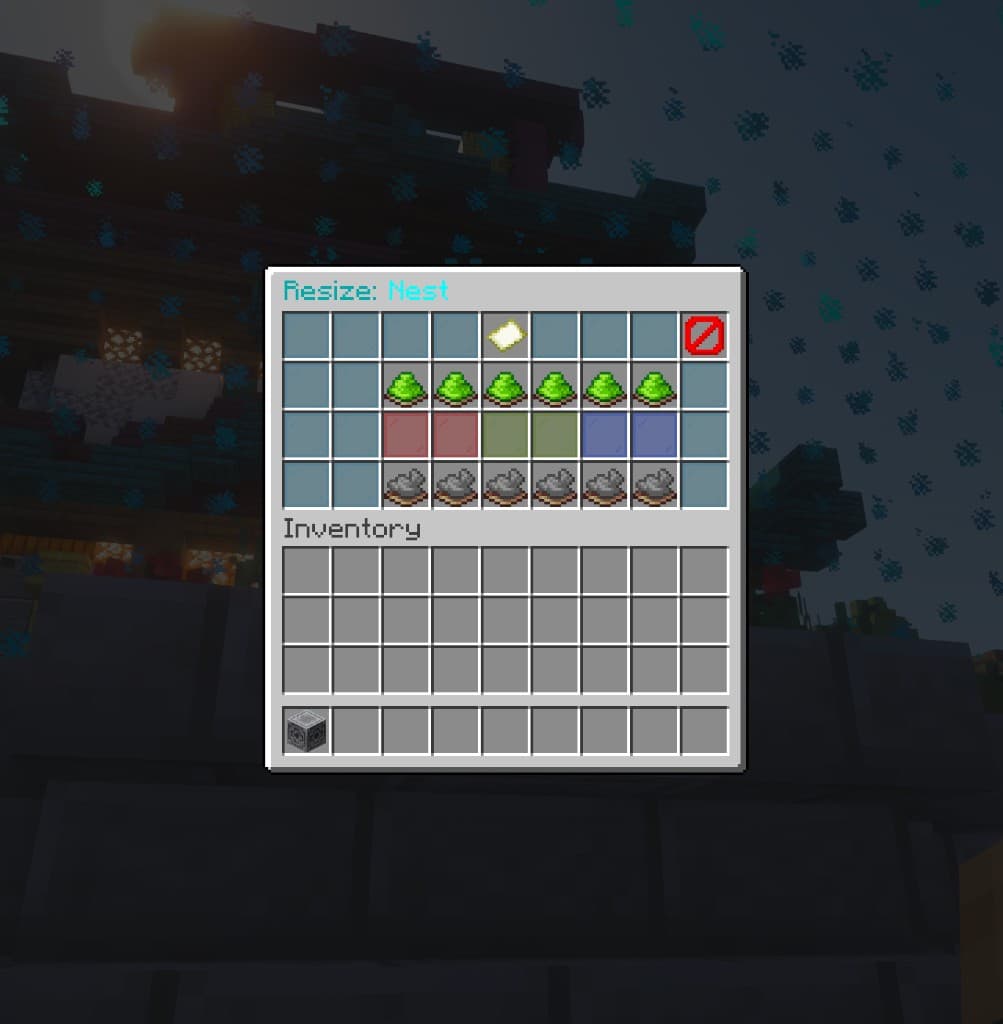
Resize zone
Click the structure void to open Resize: Nest. Stained glass marks each axis — red = X, green = Y, blue = Z. From left to right, the lime dye and gray dye pairs are +X, −X, +Y, −Y, +Z, −Z — lime grows that face, gray shrinks it.
Employees
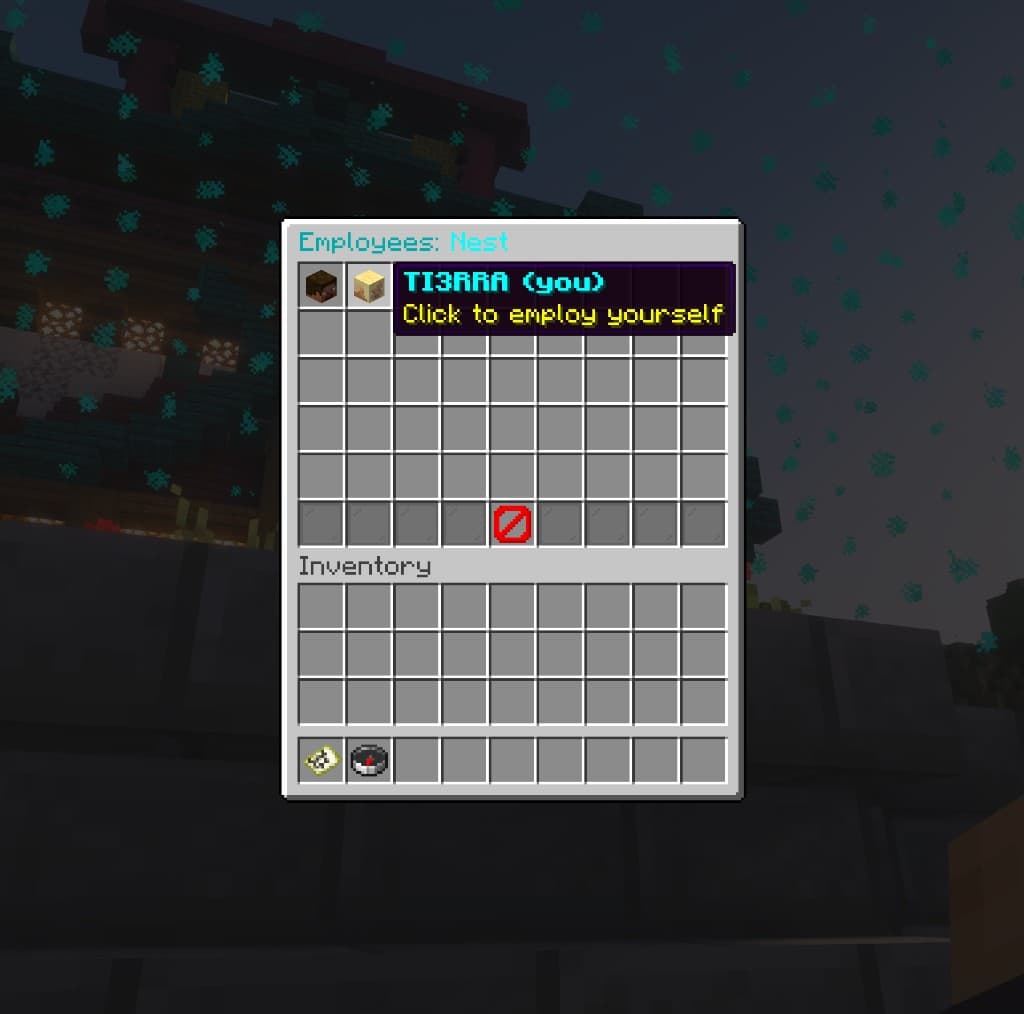
Click the player head to open Employees: Nest. Online claim members appear as heads — hover your own to employ yourself, or click someone else's head to send a work invite. If they accept, they're employed on this nest.
Calculate rank
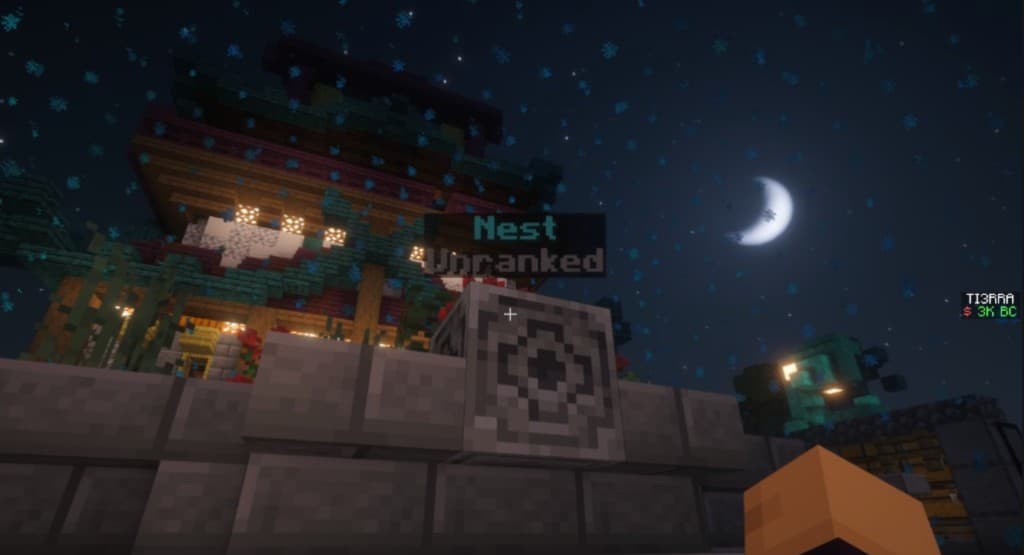
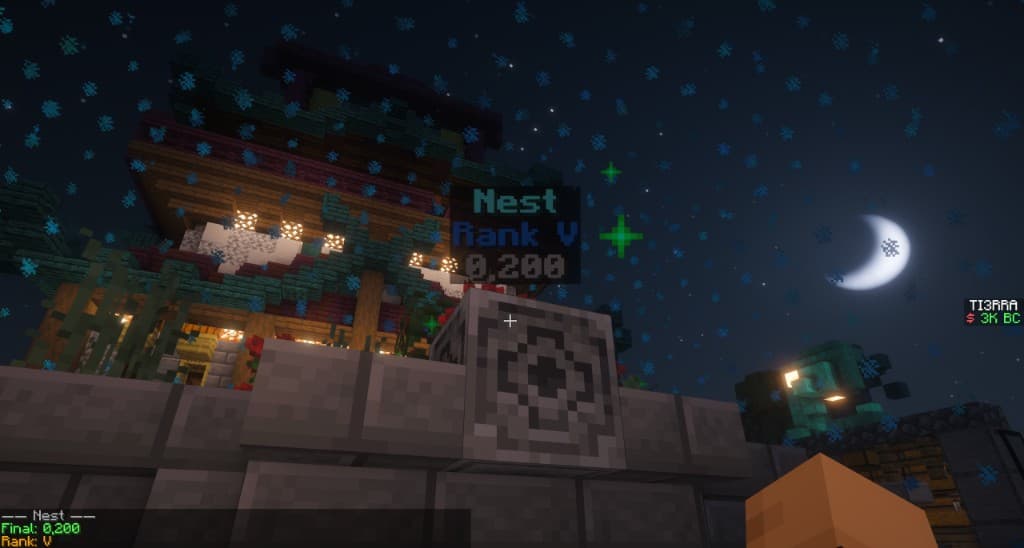
A freshly placed nest shows Unranked above the block until someone opens the nest GUI and clicks the emerald block to scan the zone. After the scan, chat prints the score breakdown and the hologram updates with your rank.
What the algorithm looks at
The score isn't about opinion — it's measured from the blocks in your zone. The biggest signals are:
- Detail — the strongest signal. Stairs, slabs, trapdoors and fine blockwork read as real craft.
- Depth & displacement — varied, non-flat surfaces beat a single wall plane.
- Symmetry— measured from the nest center or the build's centroid, whichever scores better.
- Roof craft, verticality & enclosure — a real multi-level structure with a crafted roof.
- Material balance & value — a mix of block families, not one block spammed everywhere.
- Size — bigger builds can score higher, but only if the craft holds up.
Anti-cheese is built in.Solid-cube spam, hollow boxes, slab decks, single-material walls and thin log towers are all detected and penalised — you can't game the rank by stacking cheap blocks.
Leaderboards
Open /leaderboard (aliases /lb, /top, /baltop) and pick a category:
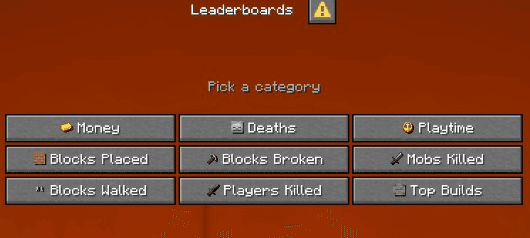
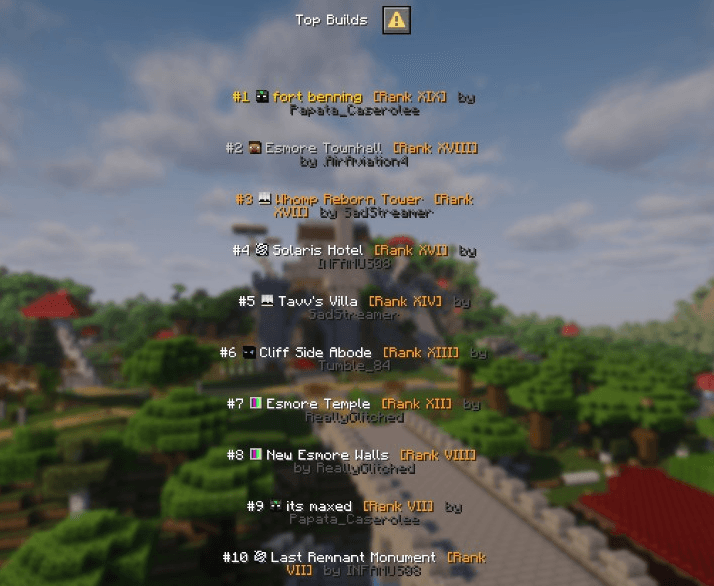
- Top Builds — highest-rated creations.
- Money, Deaths, Playtime, Blocks placed / broken / walked, Mobs killed, and Players killed.
07Shops & the Store
Run a player shop from inside your claim — stock chests, set prices, and let buyers pay in Blood Cash.
Browsing with /shop
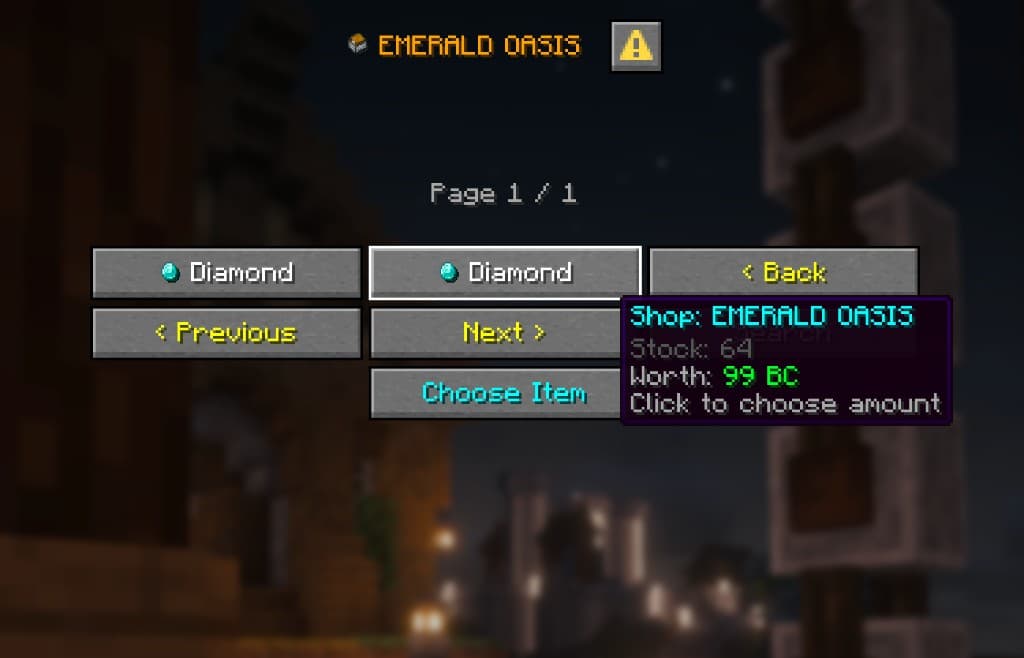
Open /shop to buy from player stores anywhere on the server. You can browse two ways:
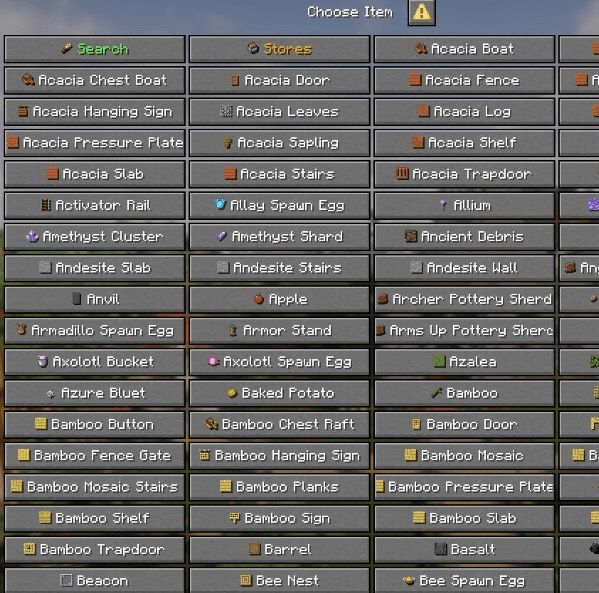
- Choose Item — scroll the full item catalog and find who is selling what.
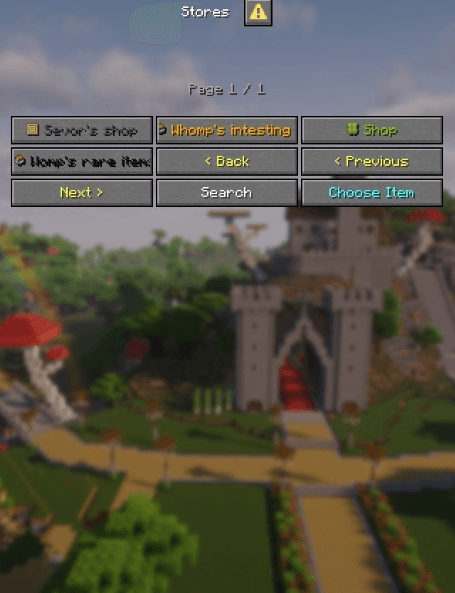
- Stores— browse by shop name and see each player's storefront.
Buying from a shop
From Stores, open a shop and pick a listing. Hover to see stock and price — click to choose how many to buy. Your Blood Cash is taken and the item is delivered a few seconds later (see Dupe-safe transactions below).
Get the starter kit
Run /shop kit once per day to receive a shop zone block, an ATM, and a safe. You need 3 free inventory slots — if you don't have room, the kit isn't consumed and you can try again right away.
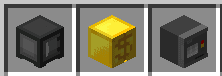
/shop kit — from left: safe, shop zone block, ATM.- Place the shop zone block inside your living claim. This marks the area your shop covers.
- Place a safe inside that same zone — this is where sale money lands. No safe, no sales.
- Stock a chest and list an item with a price. Any chest you place inside the shop zone becomes an empty listing slot automatically — right-click it to set what you sell and for how much. Buyers browse it in
/shopand in-world. - Get paid. Each purchase credits your safe in Blood Cash; collect it whenever you like.
Shop zone block
Right-click your placed shop zone block to open the zone manager. Everything about your storefront — name, color, logo, and zone size — lives here.
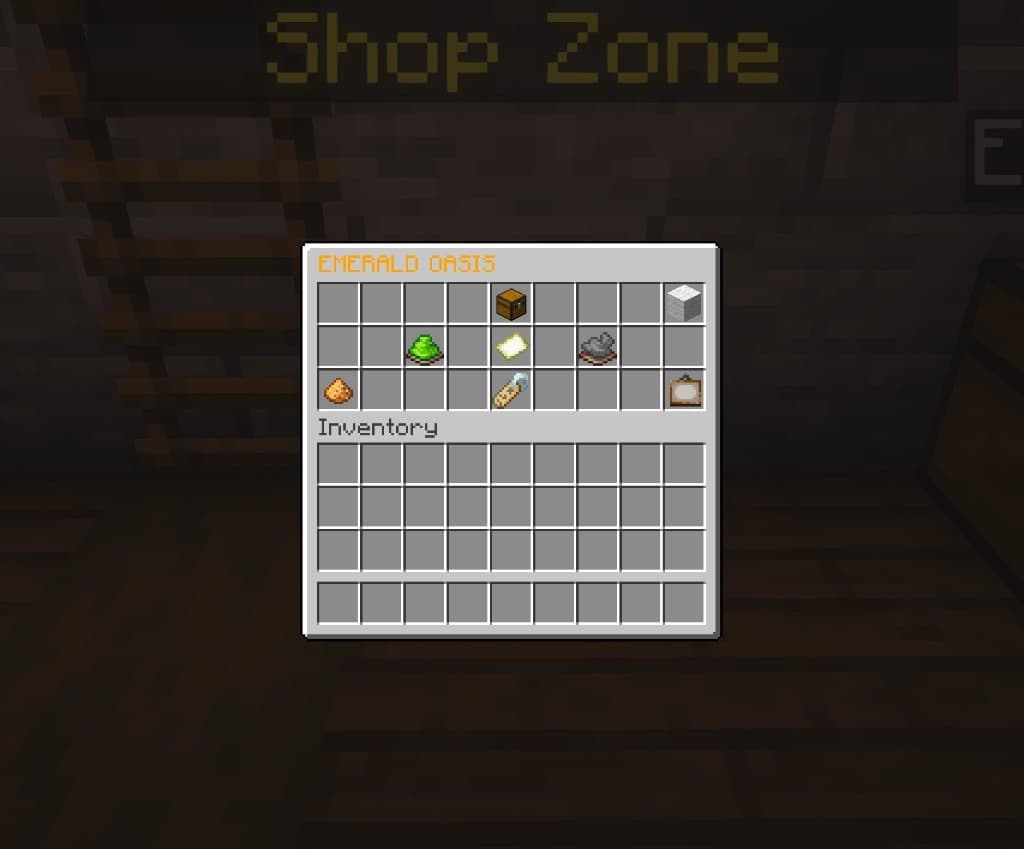
 Chest
ChestStore name
Hover to see your shop name on the zone block.
 Paper
PaperZone size
Shows the current X / Y / Z dimensions of the shop zone.
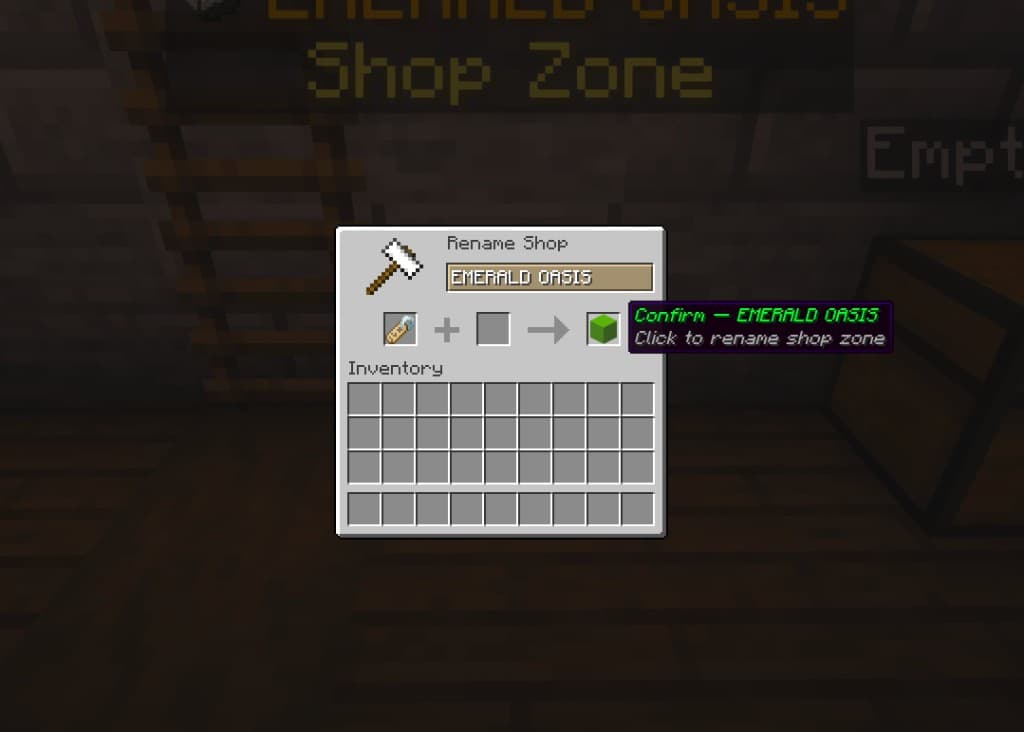
Rename brand
Opens an anvil to set your shop name (see below).
 Glowstone
Show border
Particle outline of the zone for 90 seconds.
 Lime dye
Grow zone
Expands the shop zone by 1 block.
 Gray dye
Shrink zone
Shrinks the shop zone by 1 block.
 White wool
Name color
Pick the wool color used for your floating shop name.
 Painting
Change logo
Scroll every Minecraft item and pick your shop icon. Also via /shop logo.
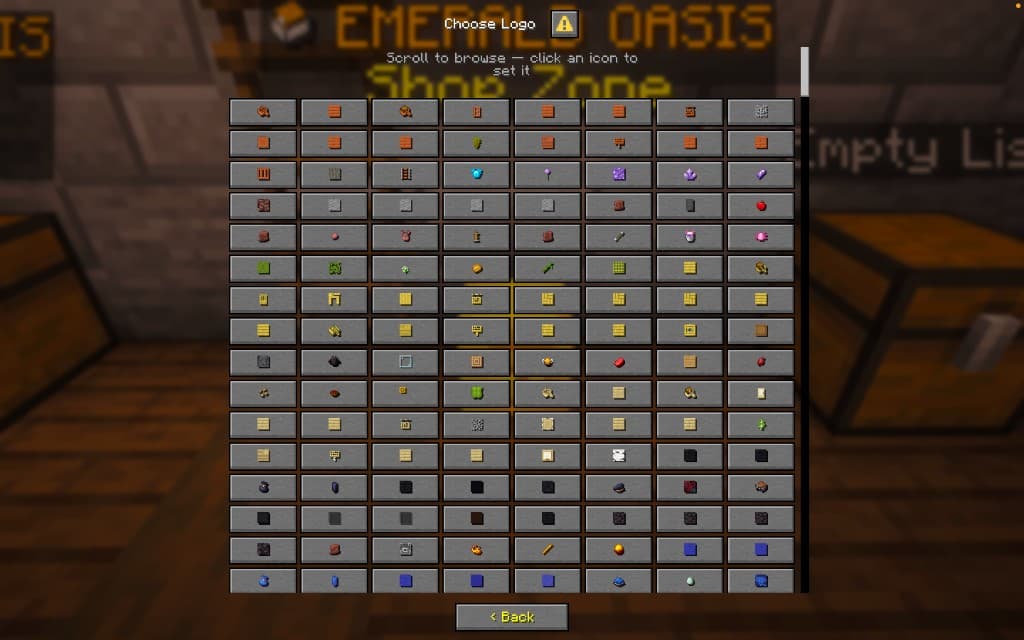
/shop logo).List a chest
Place a chest inside your shop zone, then right-click it while it's still an empty listing:
- Drop the item you want to sell into the listing slots (e.g. diamonds).
- Confirm with the green block — or cancel with the barrier.
- Set the price in the anvil GUI — type the BC amount and click the green block to list it on
/shop.
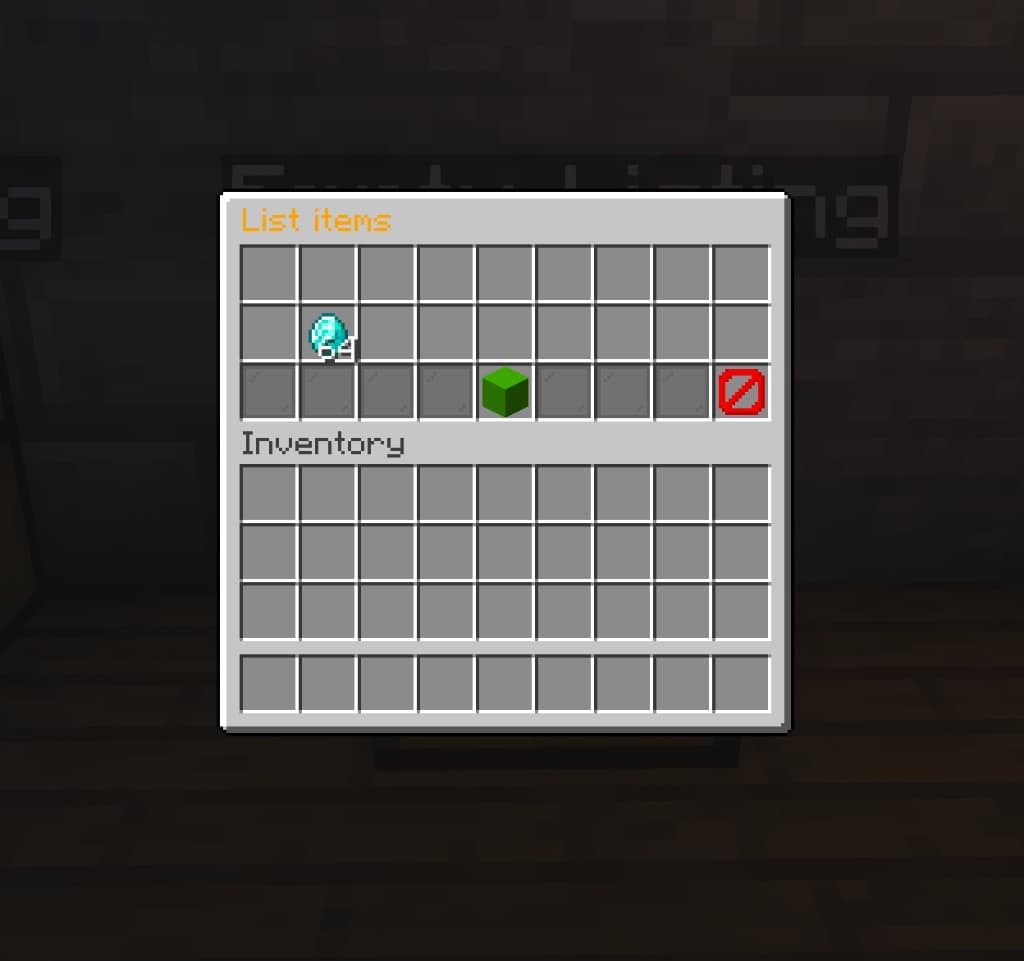
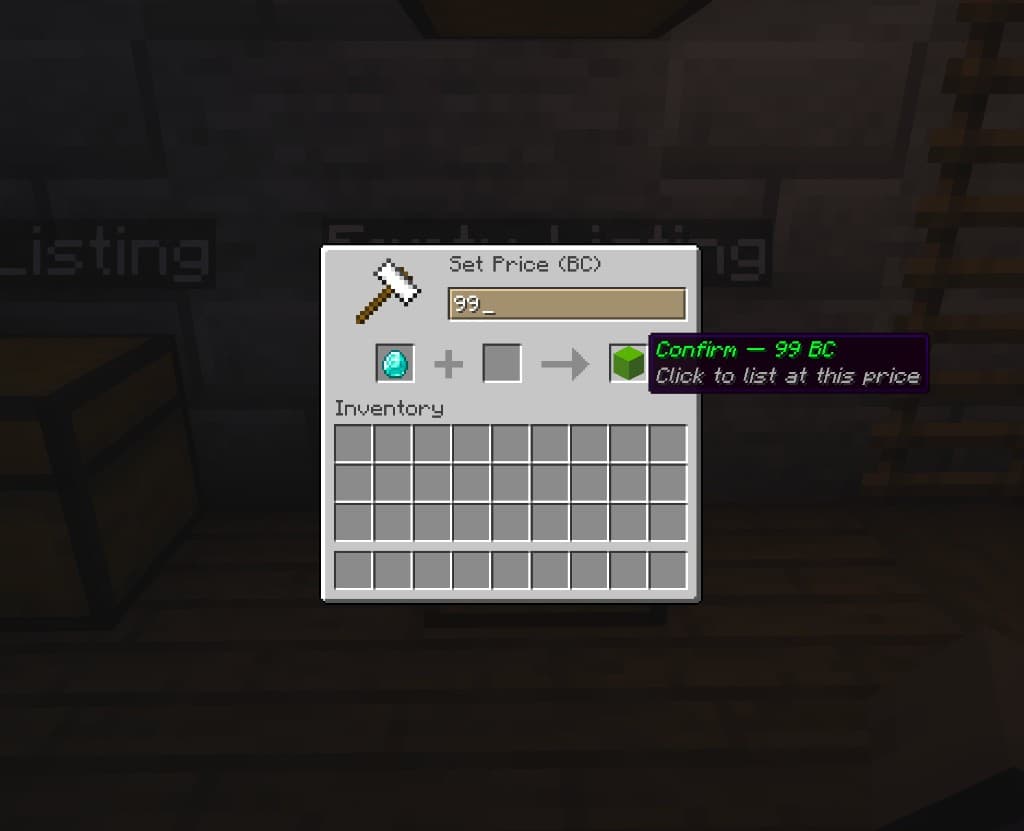
Chests = listing slots.Every chest inside your shop zone is treated as an empty listing until you price it. You don't need a special block — just place a normal chest in the zone and configure it.
A live shop in action
Below is a working setup — Emerald Oasis with a custom logo and name on the shop zone block, one active chest listing (184 diamonds @ 32 BC), one empty listing slot, a safe with 256 BC ready to collect, and an ATM with 23 BC on its floating label.
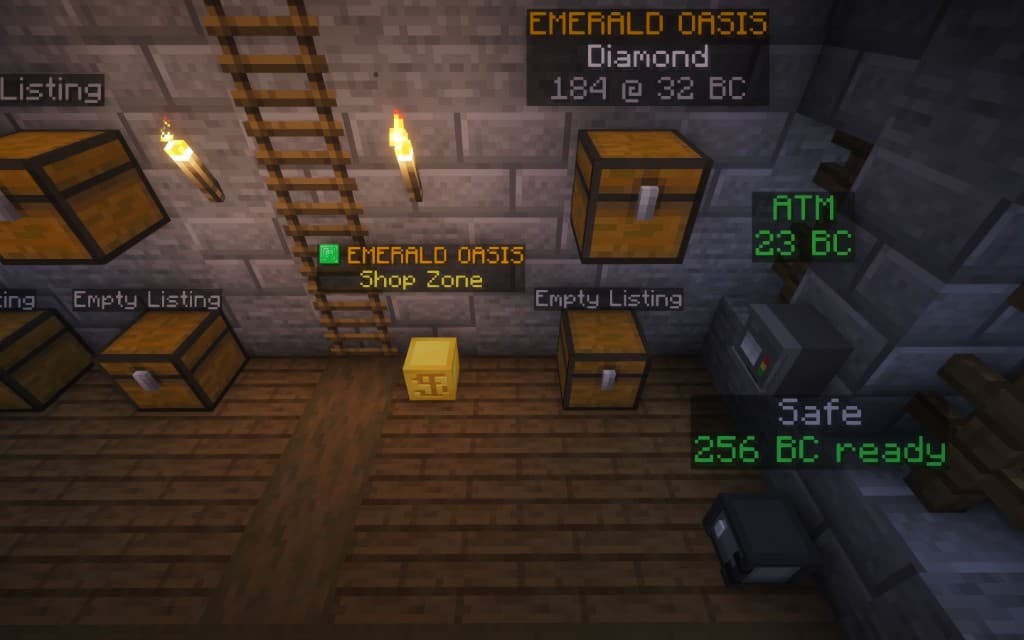
The safe must be inside the shop zone. If a listing has no valid safe in the zone, the sale is blocked — the buyer is told the owner needs a safe, and the owner is warned a sale failed. Place a safe and existing listings re-bind to it automatically.
Dupe-safe transactions
Purchases are atomic and queued. The moment you buy, your money and the shop's stock are reserved, and the item is delivered a few seconds later under protection. You can spam-buy freely — nothing can be duplicated by timing breaks or rapid clicks.
08ATMs & safes
Your ATM holds your personal balance; a shop's safe collects its sales. Both only work inside a claim.
 ATM
ATMPersonal
Your own Blood Cash balance. Right-click to open the deposit GUI — drop coins or bags into the top slots. Balance also shows on the HUD and as a floating label above the block (see live shop example).
 Safe
SafeShop
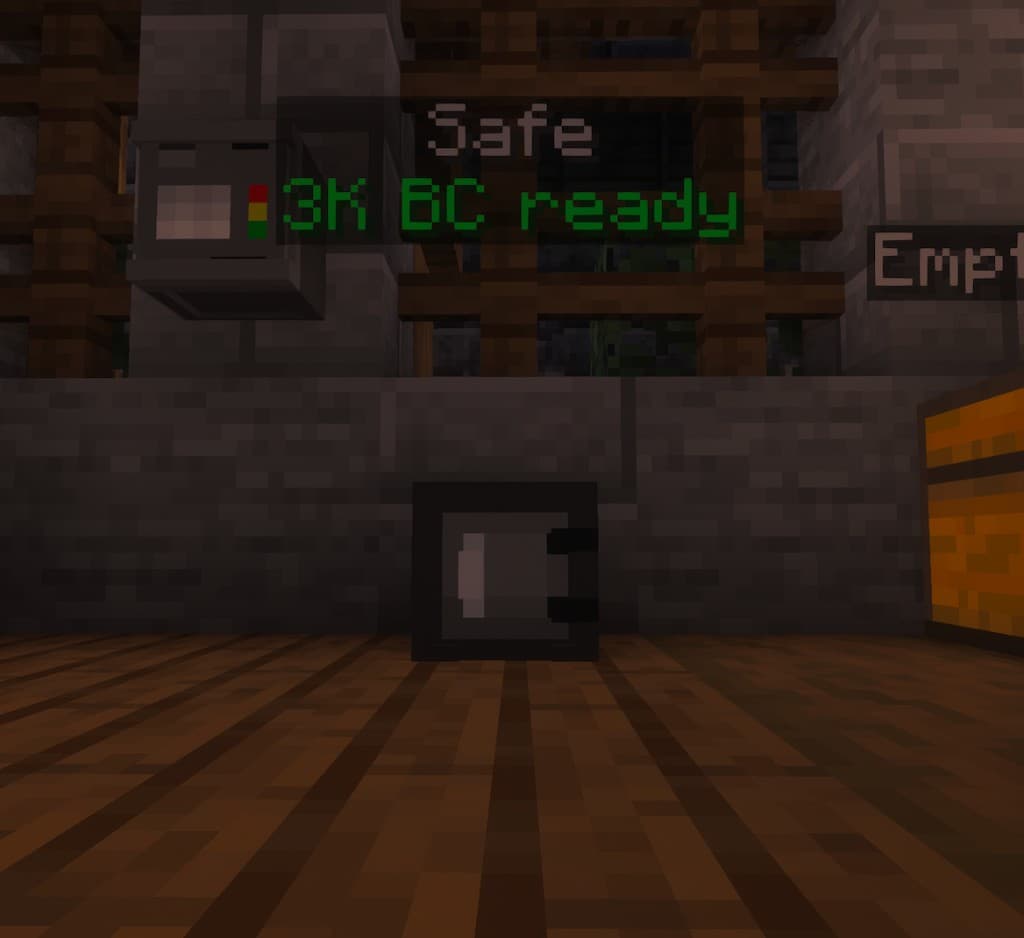
Where customer payments land. No menu — the floating label above shows how much is ready; right-click to collect shop earnings into your inventory. Break it and any stored Blood Cash drops as items.
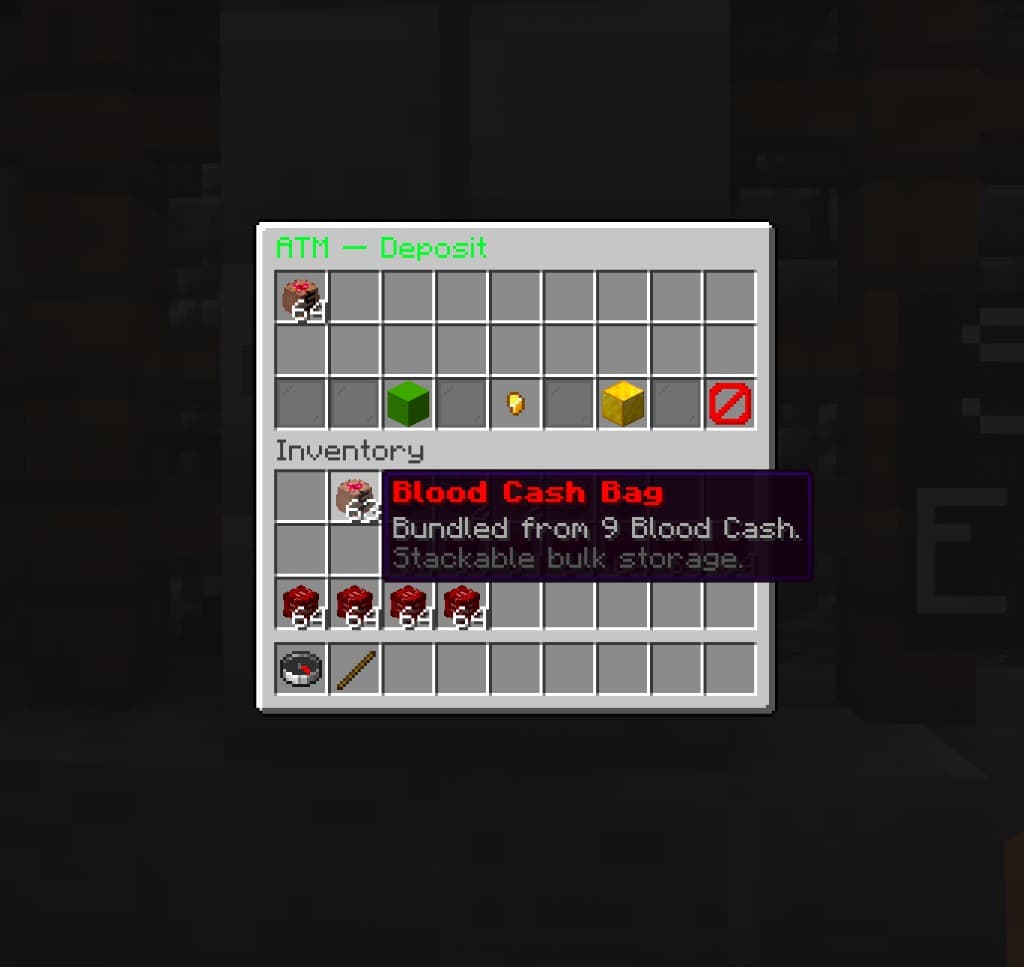
Top row — Blood Cash or bags.
Gold block withdraws max · Gold nugget opens the amount picker.
Withdrawing
From the deposit screen, use the buttons on the bottom row:
- Gold block — withdraw your full ATM balance (smart-packed into your inventory).
- Gold nugget — open the amount picker for a specific withdrawal.
 Gold nugget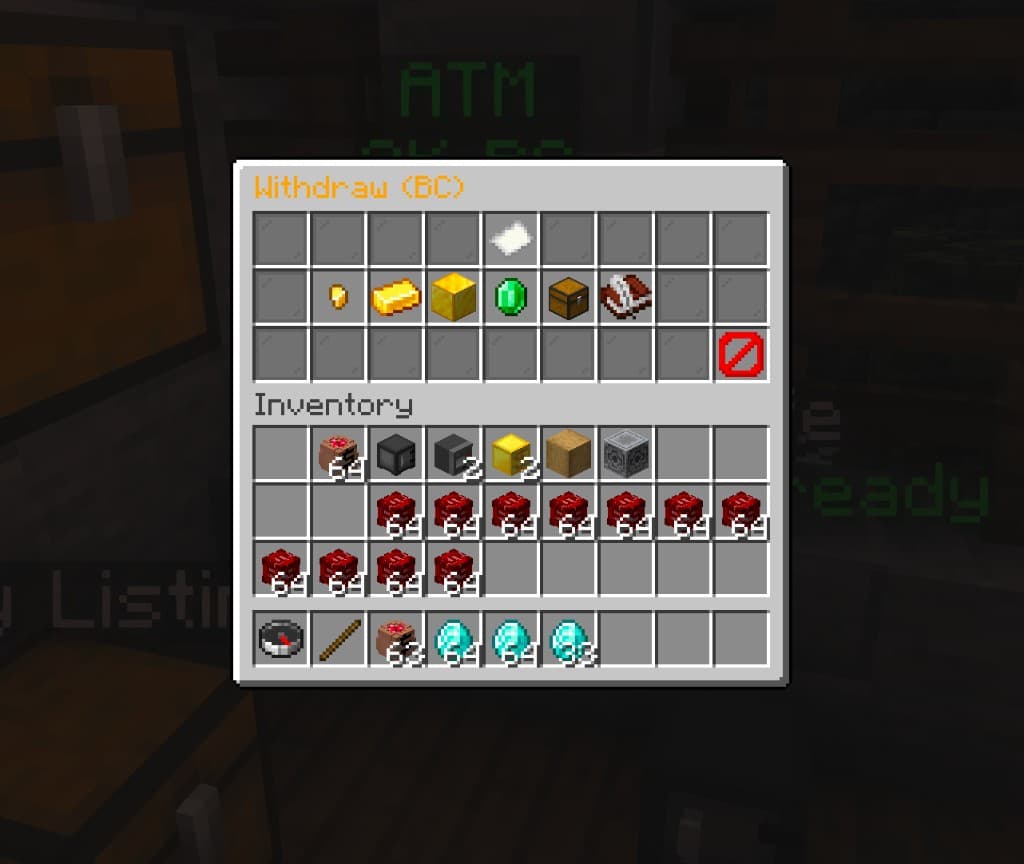
In the amount picker:
1 BC
 Gold ingot
9 BC
64 BC
 Emerald
128 BC
Fill inventory
Withdraw as much as fits — largest denominations first.
Custom amount
Type the exact BC amount in chat.
No claim, no spending. If an ATM sits outside a live claim, its balance is locked — visible but unusable — until the land is claimed again. Breaking a safe drops its Blood Cash into the world, so raiders can loot it.
09Raiding & hunting
You spawn with a compass. Right-click it to open the Compass Tracker and hunt anything worth taking.
The compass is your main raiding tool. Pick a target type and the needle points you there — some categories also let you teleport straight to the tracked location.
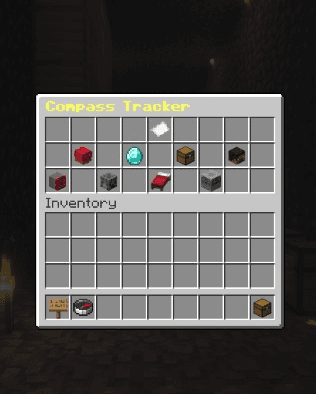
What you can track
From left to right in the tracker menu:
 Bunker
Custom bunkers
Track server bunkers. Teleport available— jump straight to the one you're tracking. Clear mobs inside for vault keycards.
Heart claims
Track active Heart Anchor claims on the map. Find bases worth raiding.
 Safezone
Safe zones
Track safe zones. Teleport available — use the compass to jump to the tracked safezone.
 Valuables
Hidden loot
Track stashes and valuables scattered around the world.
Player beds
Track a bed and teleport to it — useful for catching someone at their respawn point.
Overworld & Nether
Track ruins in either dimension. Teleport only works for overworld ruins— when you're in the Nether tracking Nether ruins, you get a bearing only.
 Builds
Rich targets
Track players carrying a lot of Blood Cash on them — the juiciest PvP targets on the server.
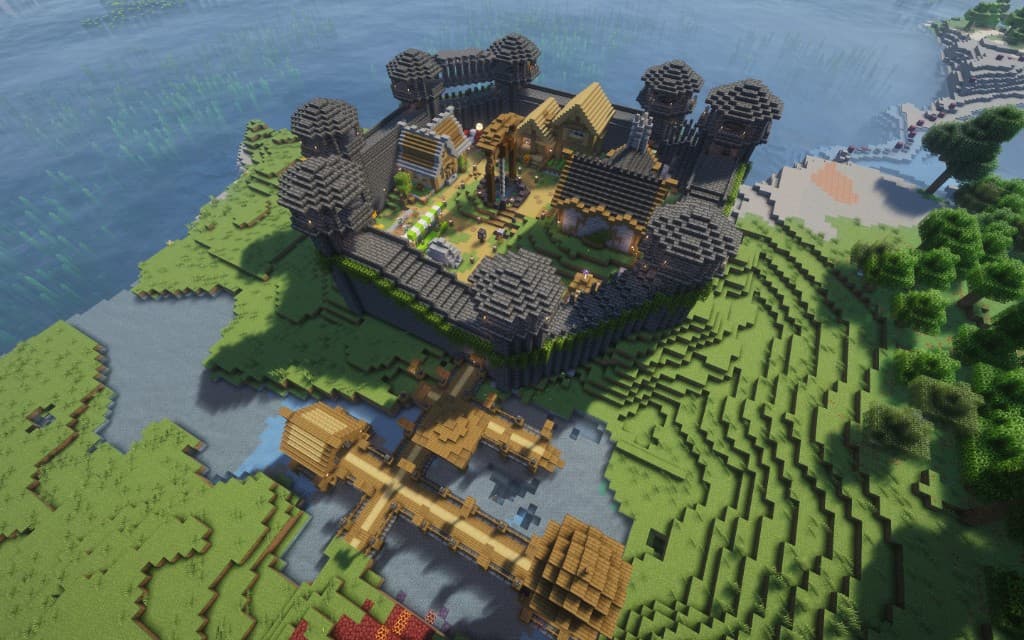
Safe zones
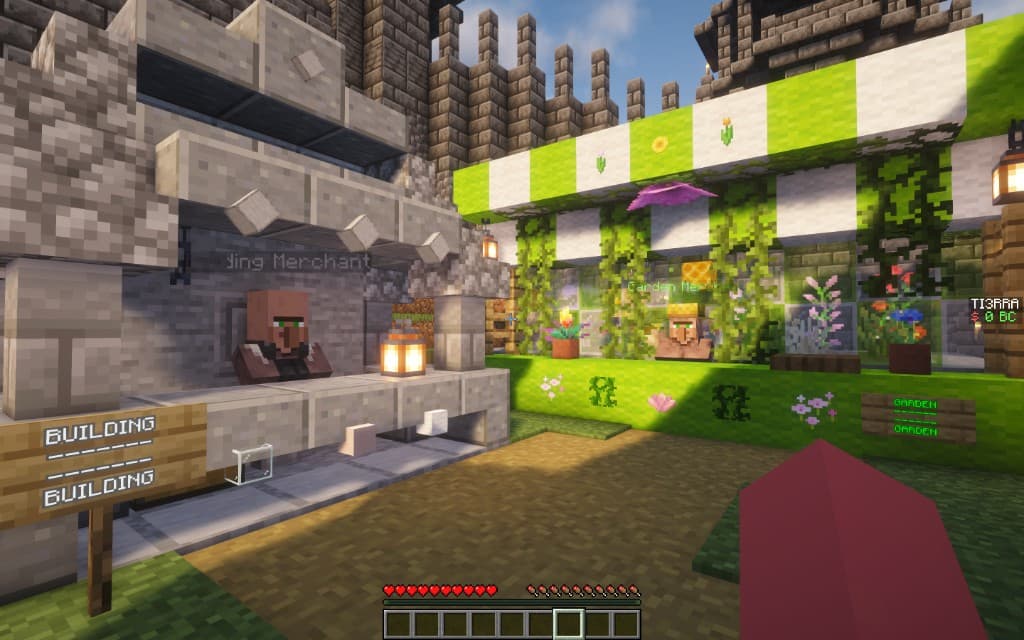
Fortified towns on the map where you can regroup safely. Track one on your compass and teleport straight there. Each safe zone has a row of category merchants — one NPC per shop type, covering the bulk buys that ruin villagers never offered.
Unlike ruin villagers, safe-zone merchants have no level and no lifespan. Every trade is unlocked from the start, stock never runs out, and they only accept Blood Cash bags(1 bag = 9 Blood Cash). Prices are deliberately premium — you're paying for convenience inside a protected town on a raiding server.
Safe-zone merchants
Right-click any merchant to open their full catalog. Each one owns a single category:
Building Merchant
Bulk building blocks by the stack — cobble, planks, logs, glass, wool, concrete, dirt, sand and more.
Garden Merchant
Seeds, saplings, bonemeal, flowers, sugar cane, bamboo and fungi.
Munitions Merchant
Arrows, tipped arrows, ender pearls, leather armour and wolf armour.
Transport Merchant
Saddles, horse armour, rails, minecarts and boats.
Redstone Merchant
Levers, lamps, slime and honey blocks, bells and redstone oddities.
Decoration Merchant
Banners, item frames, lanterns, candles, glowstone and decorative lighting.
Provisions Merchant
Cooked food, golden carrots, apples and travel rations.
Brewing Merchant
Every brewing ingredient plus brewing stands and cauldrons.
Treasure Merchant
Endgame loot — netherite gear, mace, beacon, nether star, shulker boxes and more.
Raiding in practice
- Break through decaying claims where the owner stopped feeding their Heart.
- Crack safes to spill the Blood Cash inside.
- Hunt logged-off heads (see Death & logout) for full inventories.
- Use the live map alongside the compass to spot bases, ruins, and player positions.
10Death & logout
Log off at your peril, and choose your respawn carefully.
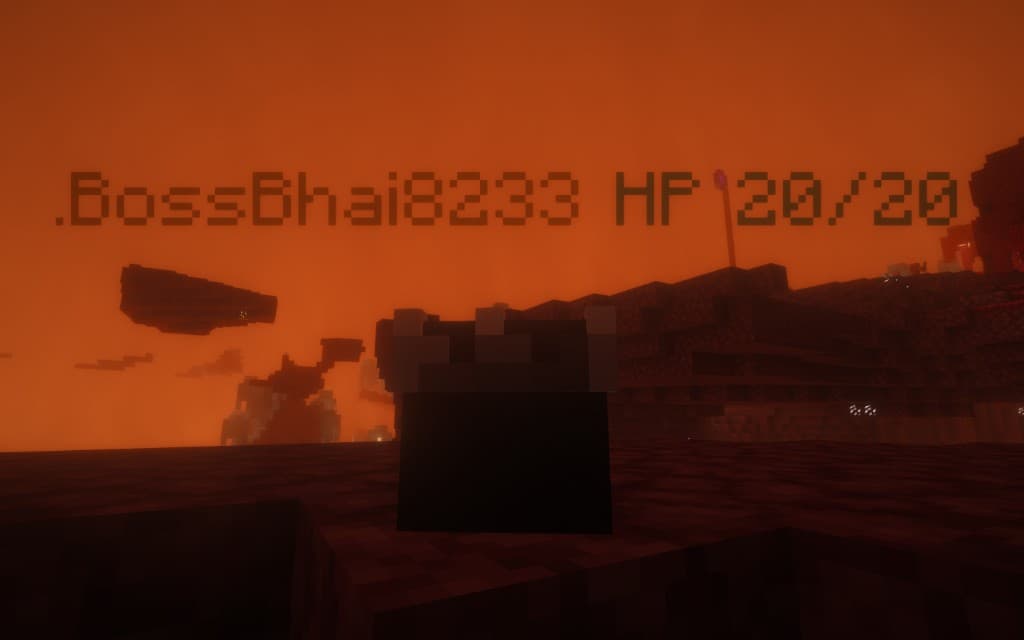
Logout heads
Disconnect and you leave a head behind in the world — trackable, killable, and holding everything you were carrying. Log out deep inside a fortified claim… or don't log out at all.
Choose your respawn
When you die, a respawn menu opens. Pick where you come back:
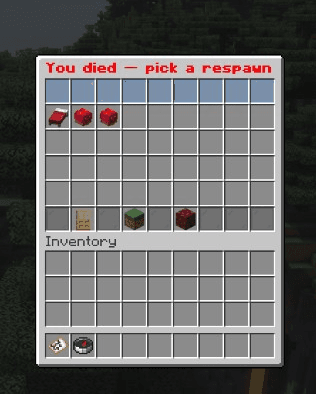
Your bed
Respawn at the bed you set — if your base still stands.
Your claim
Respawn at your Heart Anchor claim.
 Door
Door Grass
GrassRandom overworld
Drop at a random safe overworld spawn to regroup.
 Nether
Waste Heart I ruin
Random respawn at a Waste Heart I Nether ruin — high risk, high reward.
11The world
A finite arena with hard edges, ruins to loot, and a custom trade economy.
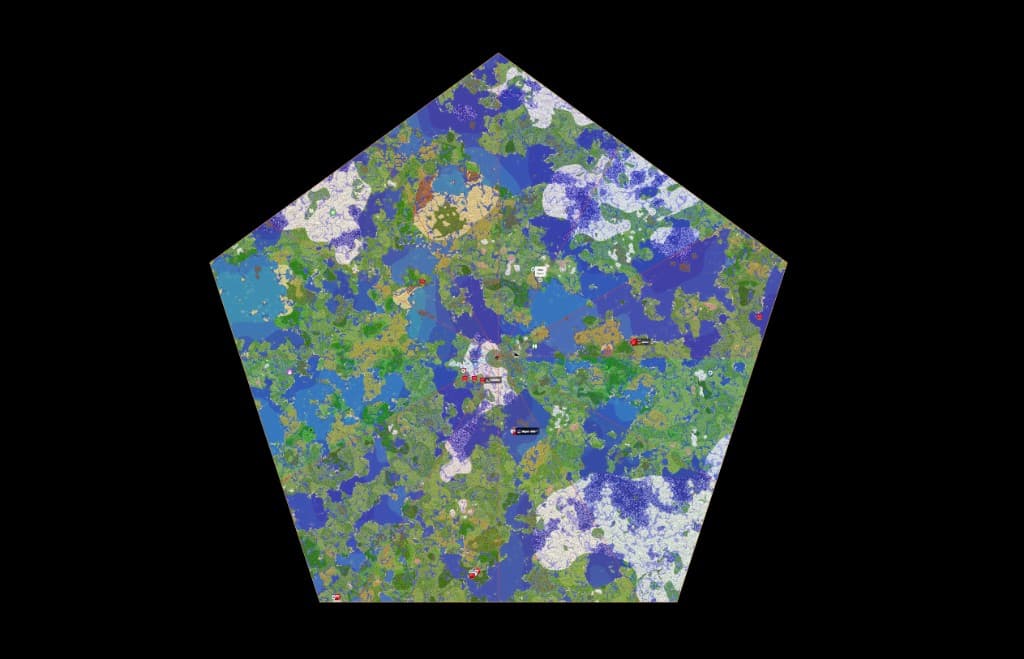
The Pentagon border
Five hard edges you cannot cross. The entire server fights over the same finite ground — there is no running off to an empty frontier. The live map shows the full pentagon with player positions, claims, and ruins in real time.
Ruins & progression
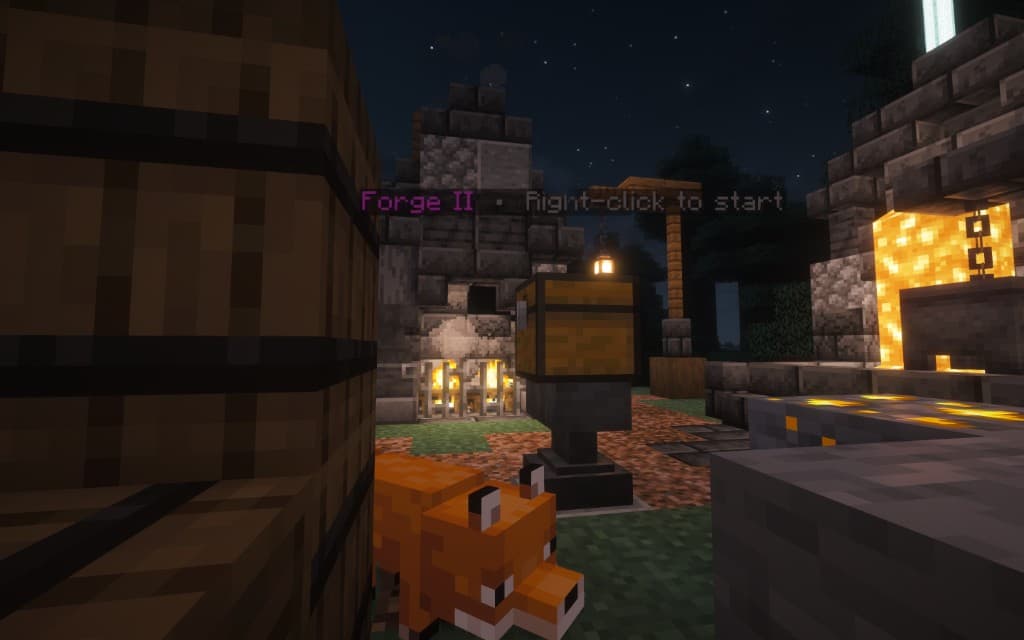
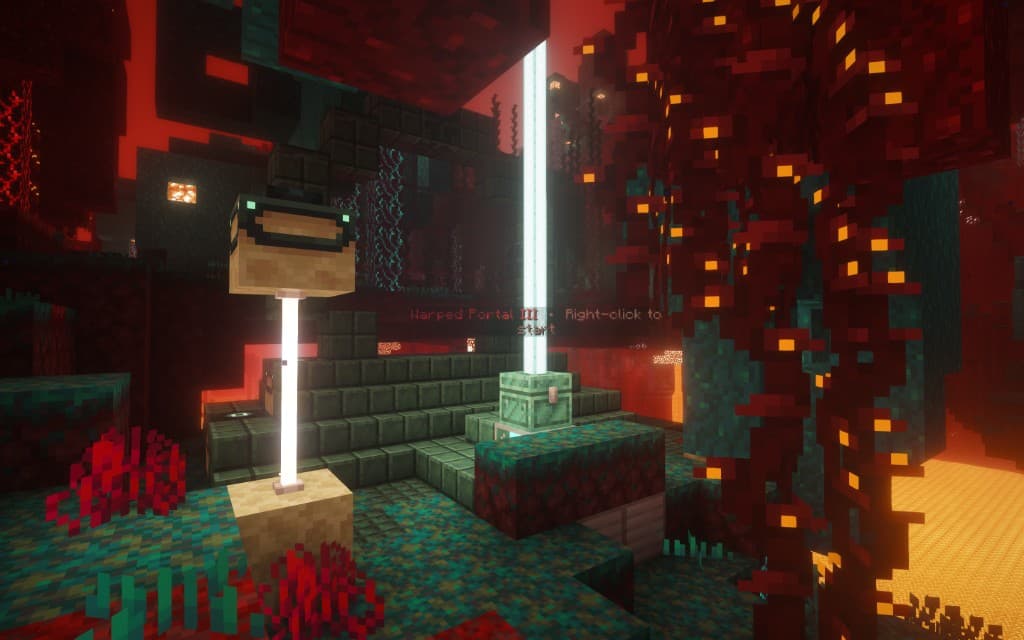
Nether and overworld ruins each drop different rewards that push your progression forward. Track them with your compass. Overworld ruins can spawn custom villagers — sell to them for Blood Cash.
Ruins are designed as open-world sites, not dungeons with interiors. Right-click the ruin to start the event — like Forge II in the overworld or Warped Portal III in the Nether.
Custom bunkers
Scattered across the map are custom bunkers — tiered dungeons you clear by fighting mobs, collecting vault keycards, and opening vault doors one by one. The last vault holds the jackpot. Track and teleport to bunkers from the Compass Tracker.
How bunker progression works
- Find a green overworld bunker. The first tier — recognizable by its lime-green beacon beam. This is where the progression chain starts.
- Enter and clear mobs. Kill enemies inside until you collect all the vault keys for that run. Keys drop from mobs — keep fighting until you have a full set for every vault door.
- Open vault doors. Each bunker has custom rolling vault doors. Right-click your vault key onto the door to unlock it and reach the loot inside.
- Progress through vaults. Work through every vault in order. Vault loot includes the green keycard (found in any overworld bunker) and higher-tier keycards needed for the next bunker tier.
- Hit the jackpot. The final vault in each bunker is where the best loot lives — push all the way through.
- Climb to higher tiers. Use keycards from vault rewards to access higher-tier bunkers. Each tier is harder and pays better — you can't skip ahead without the keycard from the tier below.
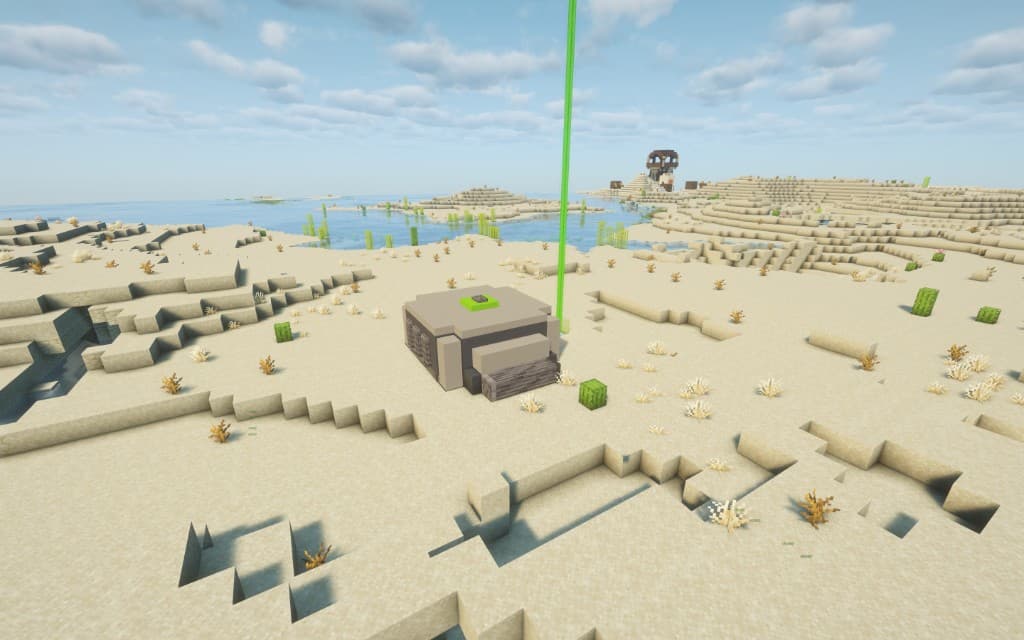
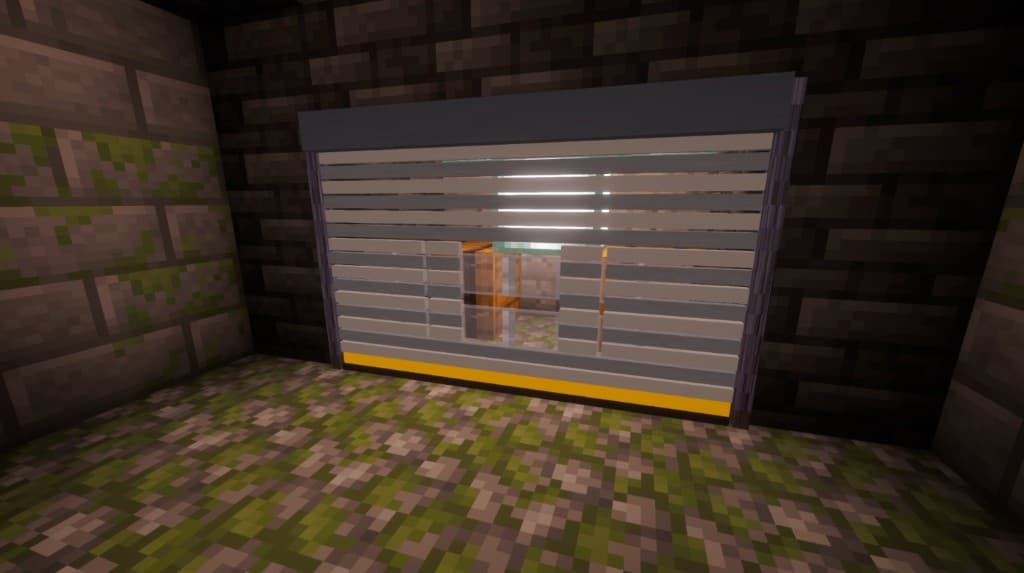
Keycard chain: the green keycard is found in any overworld bunker. Higher-tier keycards drop from vaults as you progress — each one unlocks the next bunker tier. Vault keys (from mobs) open doors inside a run; vault keycards (from loot) unlock the next bunker tier.
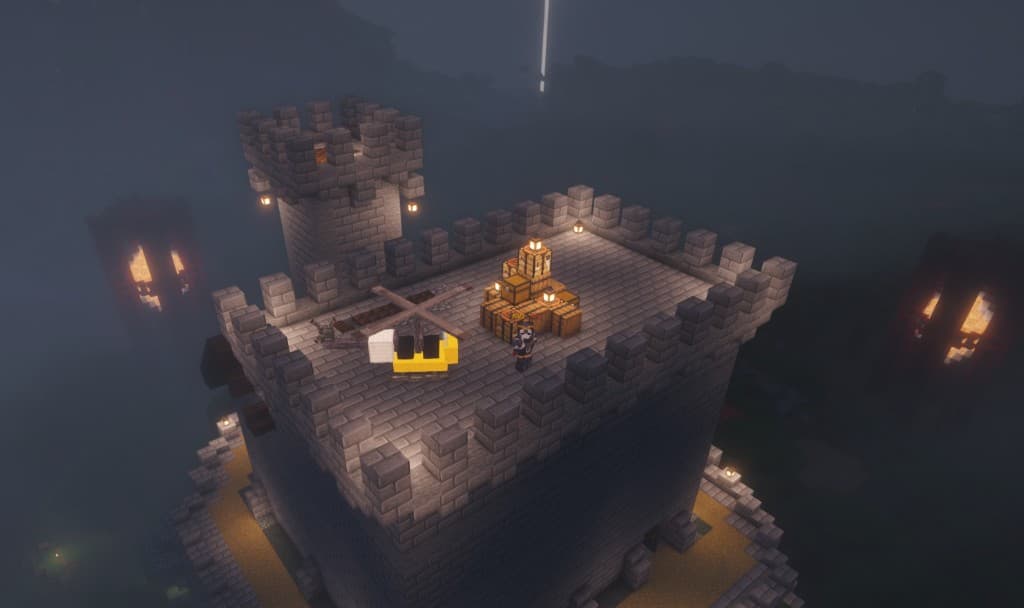
Helicopter
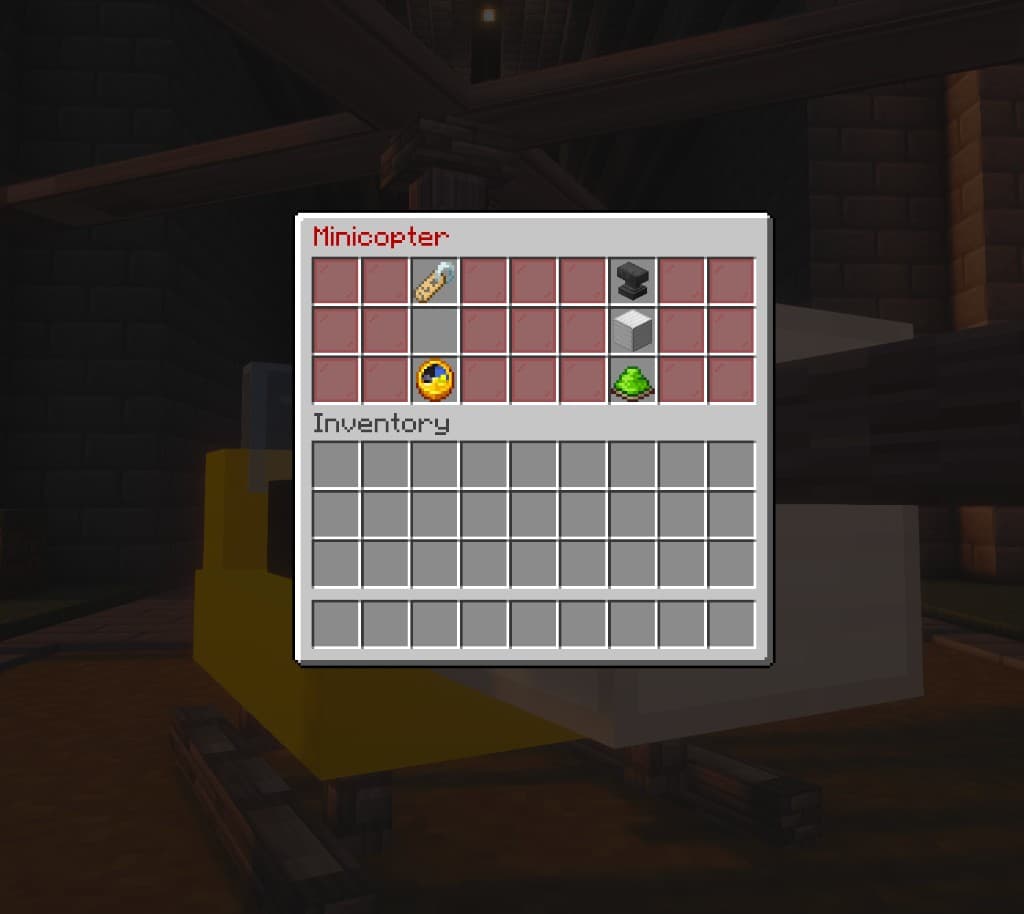
Helicopters let you fly across the map. Craft one from heli parts found in bunkers, then fuel it with Blood blocks (9 Jars of Blood each). Right-click the iron block on the helicopter to open the Minicopter fuel GUI — drop a Blood block into the slot below the nametag.
Custom villagers
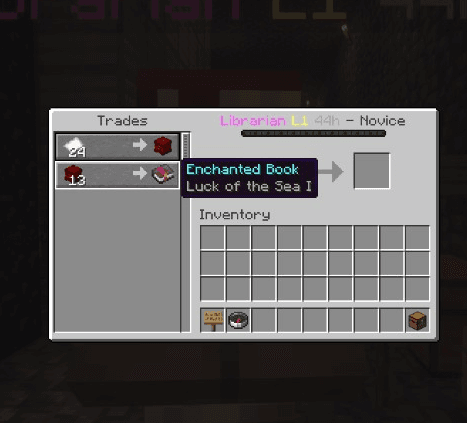
A custom villager economy tuned for the server — not the vanilla trades you already know. Find librarians and other villagers in overworld ruins and trade loot for Blood Cash items you can feed into your Heart.
12Command reference
The everyday commands you'll actually use.
| Command | Aliases | What it does |
|---|---|---|
/server heartbase | — | From the lobby, join the Heart Base SMP server. You can also click the Heartbase NPC. |
/shop | /store, /market | Open the shop browser and buy items with Blood Cash. |
/shop kit | — | Claim the daily kit: shop zone block, ATM and safe (once per 24h). |
/shop logo | — | Pick the icon shown for your shop. |
/leaderboard | /lb, /top, /baltop | View server rankings — top builds, money, deaths, playtime, blocks, mobs. |
/balance off | /bal, /hud | Hide the on-screen balance HUD. |
/balance on | /bal, /hud | Show the balance HUD again. |
More to come. This wiki is a living document — ask in Discord if something here is out of date.